You may not have noticed it, but watching videos on the internet these days is typically more than just watching videos.
It can be as simple as having a “Skip Recap” or “Skip Intro” button while watching a TV show. It might be Prime Video’s X-Ray feature, which shows actors, songs, or even trivia about what’s currently on screen. There are WWDC’s interactive transcripts (like this example). Educational video content might pause playback to present questions. Video marketplaces can display “buy it now” buttons. The list goes on.
These features all provide different experiences for a viewer. But if you take a step back, you might notice one shared, basic element: They all provide additional context for the media that is tied to the media’s timeline.
A feature might be shown all upfront (like the transcript), or it might be shown only when you’re playing that portion of the media (like the “Skip Intro” button), but in either case, it’s connecting the time in the media to some other related information. From a generic technical perspective, this is sometimes called timed metadata. As these examples show, timed metadata allows you to augment, contextualize, and enrich a user’s media-centric experience in whatever way makes sense for the product, application, or media in question.
The basic idea behind timed metadata is simple: Take some kind of information, give it a time or time range that corresponds to the media’s timeline, and keep track of that relationship. In Mux Player (and the more primitive Mux Video Component), you can add “out-of-band” timed metadata in the form of CuePoints. For now, we’ve kept our implementation fairly simple.
A CuePoint has two properties: a time for when the CuePoint begins in your media (more on this later), and a generic value that you can use to store any JSON serializable information that makes sense for your use case. This could be the question you want to show, or a “skip” button, or details about the product currently being shown. CuePoints keeps things simple and generic so you can use them for any number of use cases.
Working with CuePoints
To give you a sense of how to work with CuePoints, we’re going to build a concrete example — an interactive video transcript. When we’re done, our simple application should do the following:
- Show the entire transcript for the video
- Indicate when each sentence of the transcript begins
- Seek to the corresponding time in the video when clicking on a sentence
- Indicate which sentence in the transcript is currently playing
If you’d rather just see the complete working example in action, you can check our version on codesandbox (though I’d still recommend you take a look at the final section, where we also show a few other use cases for CuePoints).
In this example, I’m using TypeScript and our React “flavor” of Mux Player, but this same thing could be built in the framework of your choice or even with vanilla HTML and JavaScript using our Web Component version.
Bootstrapping our Mux Player application
Before doing anything CuePoint related, let’s get a basic app using Mux Player with a playbackId in place. I’ve bootstrapped my application by using Create React App and adding TypeScript. If you’re not super familiar with TypeScript, don’t worry; it will be very minimal in this example. After bootstrapping, the only remaining thing to do is add @mux/mux-player-react@latest as a dependency.
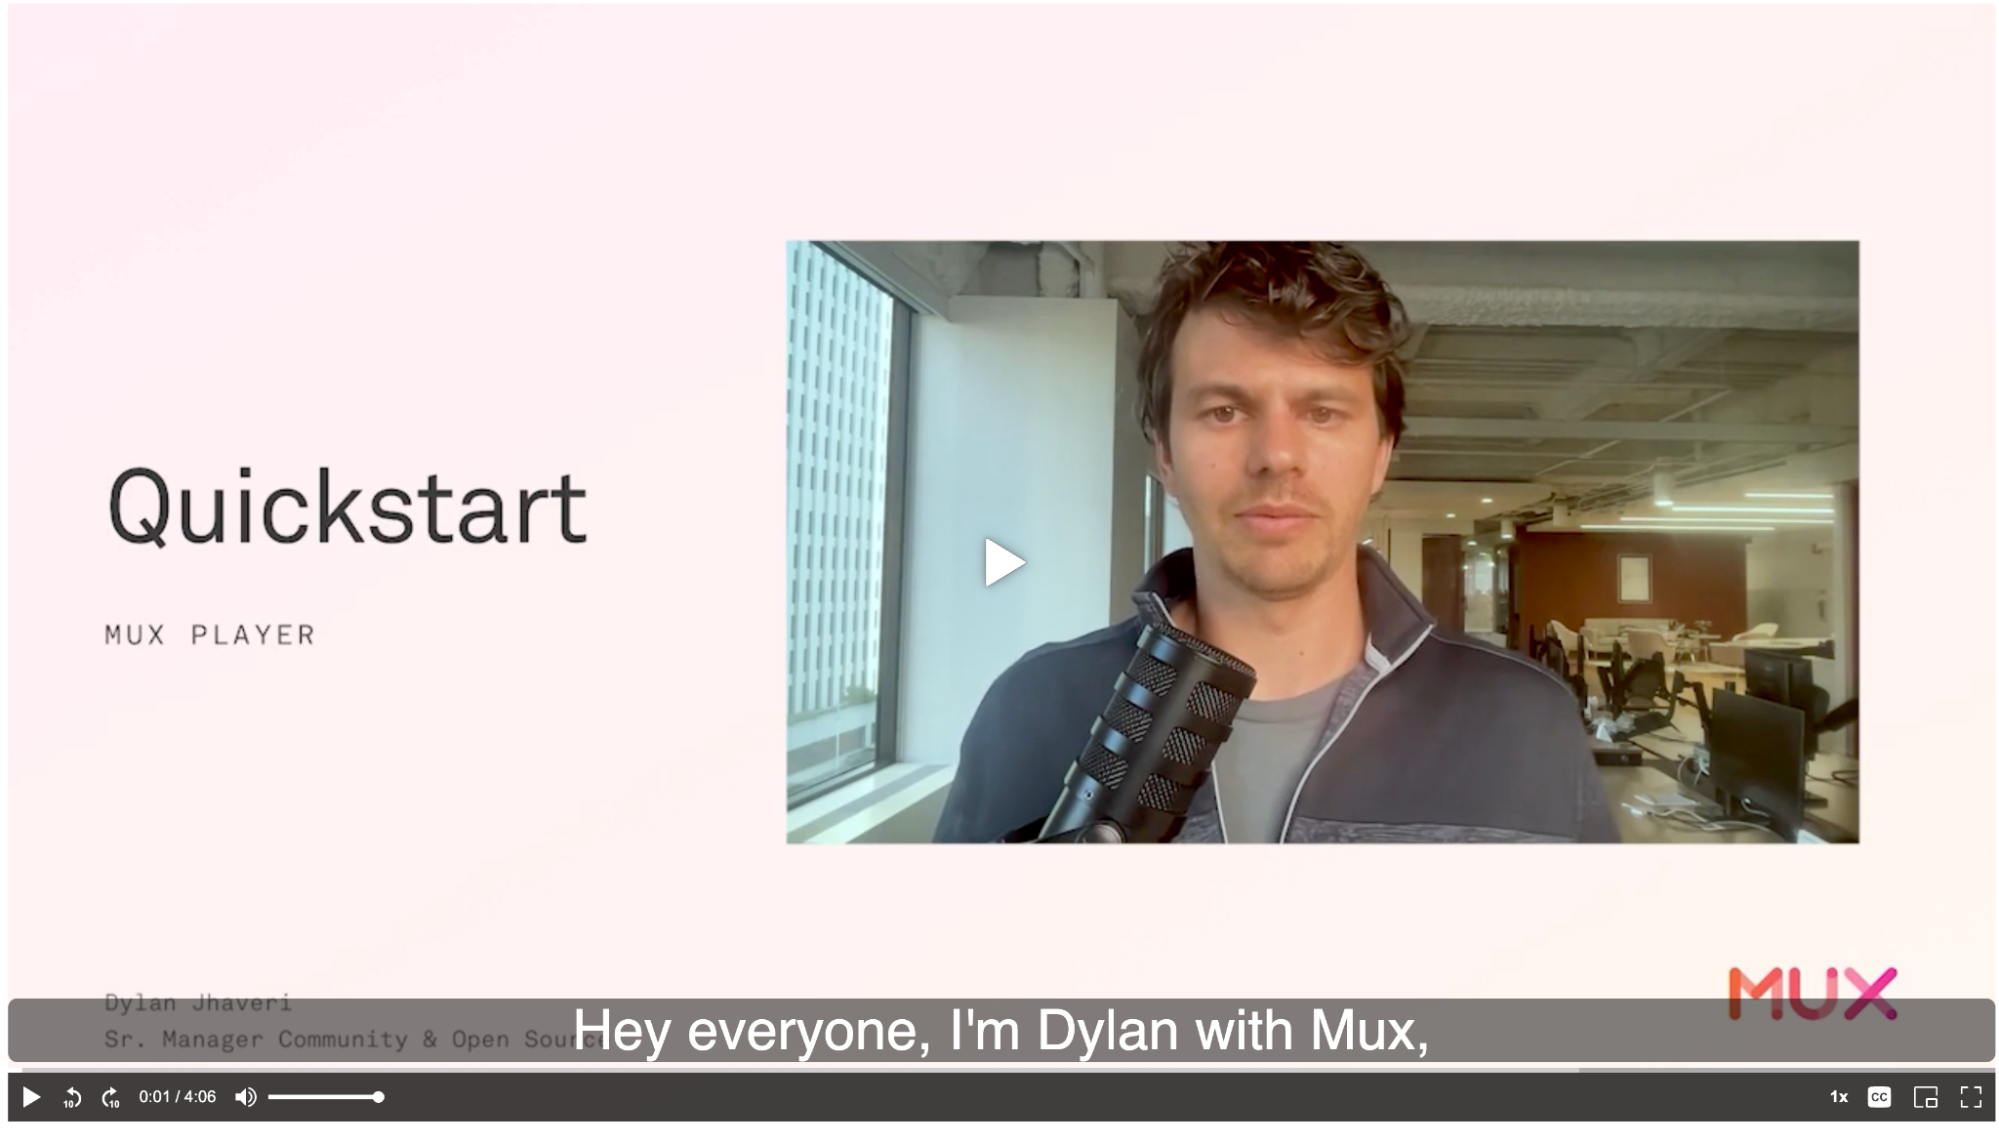
Once that’s done, simply replace our App function content with a <MuxPlayer/> and a playbackId. Here’s one with our team’s fearless leader, Dylan Jhaveri, giving an overview of Mux Player:
export default function App() {
  return (
    <div className="App">
      <MuxPlayer
        playbackId="jwmIE4m9De02B8TLpBHxOHX7ywGnjWxYQxork1Jn5ffE"
      />
    </div>
  );
}
If everything’s in place and working, you should see something like this when loading the page/app:
Showing our transcript
Now that we have a working mini app with a player, let’s create some transcript data that conforms to CuePoints so we can build our transcript UI. Recall that a CuePoint needs two bits of data: a (start) time and a value. Because strings are JSON-serializable values, we can break each transcript CuePoint into 1+ sentence for the value and a time (in seconds) for when that sentence begins:
const cuePoints = [
  {
    time: 0,
    value:
      "Hey everyone, I'm Dylan with Mux, and today we are going to get started with Mux Player."
  },
  {
    time: 6.320666666666667,
    value:
      "Mux Player is a drop in web component for doing video playback with Mux assets in your web application."
  },
  {
    time: 16.480666666666664,
    value:
      "Let's jump into it. So first I'm gonna start here in the Mux dashboard. You may already have assets in your Mux dashboard, and normally you'd probably be creating assets with API calls."
  },
  {
    time: 28.783944,
    value:
      "But just to speed things up, I'm gonna create one here directly in the dashboard, and I'll just use the default Mux intro video to create that."
  },
  {
    time: 38.98066666666667,
    value:
      "So this is the asset I just created. Now, let's drop in Mux player into a web application that I have."
  },
  {
    time: 47.64066666666667,
    value:
      "So I'm going to need this playback id, so lemme just copy that real quick to my clipboard."
  },
  {
    time: 51.784634,
    value:
      "And if I go here, I have this, a kind of default code sandbox, just plain HTML application."
  },
  {
    time: 60.1,
    value:
      "So first thing I need to do here is install Mux Player as a dependency, and that's @mux slash mux-player on npm."
  },
  {
    time: 70.52066666666667,
    value: "I'm gonna go over to this index. I don't need this code."
  },
  {
    time: 73.68066666666667,
    value: "And then let me just import here @mux mux-player."
  },
  {
    time: 80.692936,
    value:
      "Okay, so now I have imported the package into my HTML and I'm gonna change this to just be an H1 Hello Mux player."
  },
  {
    time: 92.21066666666667,
    value: "Save that. Okay, all set up."
  },
  {
    time: 96.04066666666667,
    value: "Now let's jump over to the Mux player docs here."
  },
  {
    time: 99.74066666666667,
    value: "And in this quick start, see I've already installed it."
  },
  {
    time: 103.2,
    value:
      "This is the HTML code to get started, so I'm just gonna copy that, jump over here and let's just paste that code."
  },
  {
    time: 112.26066666666667,
    value:
      "But I want to use, I'm gonna use this playback ID from the Mux dashboard and just drop that in there."
  },
  {
    time: 119.432332,
    value:
      "Okay, save that. See, that's the asset I just created and right now, that's it."
  },
  {
    time: 126.55066666666667,
    value: "That's everything I have to get to get started."
  },
  {
    time: 128.79066666666668,
    value:
      "Everything's working out of the box and really all I needed was that one playback id, one line of code."
  },
  {
    time: 133.71066666666667,
    value: "And right now I have this fully functional video player."
  },
  {
    time: 135.85066666666668,
    value:
      "You can see on small screens the controls are overlaid on top of the player; as I go to a larger screen, those controls rearrange and shift down the control bar."
  },
  {
    time: 145.488076,
    value:
      "The defaults are all here baked in for you: playback rate, speed up the video, jump forward and jump back by 10 seconds."
  },
  {
    time: 153.96066666666667,
    value:
      "And this would work with a live playback id: if it's a live stream, then you'll get a UI that's live, you set to specify with the stream type that it's live."
  },
  {
    time: 162.04066666666668,
    value:
      "And also Chromecast is enabled by default, so I have a Chromecast connected."
  },
  {
    time: 166.26066666666668,
    value: "I'll see the Chromecast control, AirPlay's enabled by default."
  },
  {
    time: 169.168699,
    value: "Let's actually jump over to Safari to see AirPlay."
  },
  {
    time: 175.86535,
    value:
      "So we'll load this web app in Safari and you can see I have the AirPlay control here."
  },
  {
    time: 181.993202,
    value: "So everything you just kind of get all of that out of the box."
  },
  {
    time: 186.27066666666667,
    value:
      "This nice responsive player experience with just that one line of code."
  },
  {
    time: 190.21066666666667,
    value:
      "And again, this is a web component, so it works with any JavaScript framework that you're using to build your application."
  },
  {
    time: 196.636482,
    value:
      "We do also have a Mux player React package, which gives you a React component, which has the same functionality."
  },
  {
    time: 203.45066666666668,
    value:
      "And also notice here that some other nice features is you get the timeline hover previews for your video."
  },
  {
    time: 209.43066666666667,
    value:
      "So as I hover over this video, I can see the little thumbnails popping over the timeline makes it really easy for scrubbing."
  },
  {
    time: 216.717663,
    value: "And notice this metadata."
  },
  {
    time: 219.20066666666668,
    value:
      "So this metadata video title and viewer ID that is actually directly integrated with Mux Data."
  },
  {
    time: 224.41908,
    value:
      "So Mux Data will monitor the video playback experience, quality of experience metrics, so you can make sure that your users are having a good time viewing your video."
  },
  {
    time: 233.26066666666668,
    value:
      "And that's all wired up by default; passing some metadata makes that data more useful. And that's it."
  },
  {
    time: 238.68066666666667,
    value:
      "One line of code. You get all the features of Mux video and Mux data integrated."
  }
];
Now that we know what our data will look like and have something to work with, we can start building our components to render the transcript, even before we hook the CuePoints up to Mux Player. For data-driven list UIs, I like to break the UI into at least two components: one that’s responsible for rendering each item in the list (i.e., each CuePoint) and one for rendering each of those components as a list (i.e., all of the CuePoints).
For now, our <TranscriptCuePointRenderer/> needs to take a cuePoint as a property and render its value — i.e., the transcript sentence(s). To make it a little fancy, we’ll also show a different background and show the time as a tooltip on :hover. Here’s the TSX for the component (plus a simple utility function to format the time):
const formatTime = (seconds: number | undefined) => {
  if (seconds == null) return "--:--";
  const date = new Date(0);
  date.setSeconds(seconds);
  const substrStart = seconds / (60 * 60) >= 1 ? 11 : 14;
  const timeString = date.toISOString().substring(substrStart, 19);
  return timeString;
};

type CuePoint = { time: number; value: string };

const TranscriptCuePointRenderer = ({ cuePoint }: { cuePoint: CuePoint }) => {
  const { value, time } = cuePoint;
  return (
    <span className="transcript-cuepoint">
      {value}
      <span className="tooltiptext">{formatTime(time)}</span>
    </span>
  );
};
And here’s the corresponding CSS you can add to your stylesheet to get the fancy hover behavior:
.transcript-cuepoint {
  position: relative;
}

.transcript-cuepoint:hover {
  background-color: lightblue;
}

.transcript-cuepoint:hover > .tooltiptext {
  visibility: visible;
}

.tooltiptext {
  visibility: hidden;
  background-color: rgb(32, 178, 170, 0.85);
  color: #fff;
  text-align: center;
  padding: 5px;
  border-radius: 6px;
  /* Position the tooltip text */
  position: absolute;
  z-index: 1;
  width: 60px;
  bottom: 110%;
  left: 50%;
  margin-left: -30px;
}
Next, let’s make the <TranscriptRenderer/>, which will render all the transcript CuePoints using our <TranscriptCuePointRenderer/>. To make it read like a transcript, we’ll render each CuePoint/transcript sentence inline (which is why we used a <span> above) and add a space between each CuePoint rendered. It should look something like this:
const TranscriptRenderer = ({ cuePoints = [] }: { cuePoints: CuePoint[] }) => {
  return (
    <div className="transcript">
      {cuePoints.map((cuePoint, i) => {
        const spacer = i < cuePoints.length - 1 ? " " : "";
        return (
          <Fragment key={cuePoint.time}>
            <TranscriptCuePointRenderer cuePoint={cuePoint} />
            {spacer}
          </Fragment>
        );
      })}
    </div>
  );
};
All that’s left to show our transcript is adding the <TranscriptRenderer/> to our <App/> and giving it the cuePoints:
export default function App() {
return (
<div className="App">
<MuxPlayer
playbackId="jwmIE4m9De02B8TLpBHxOHX7ywGnjWxYQxork1Jn5ffE"
/>
<TranscriptRenderer cuePoints={cuePoints} />
</div>
);
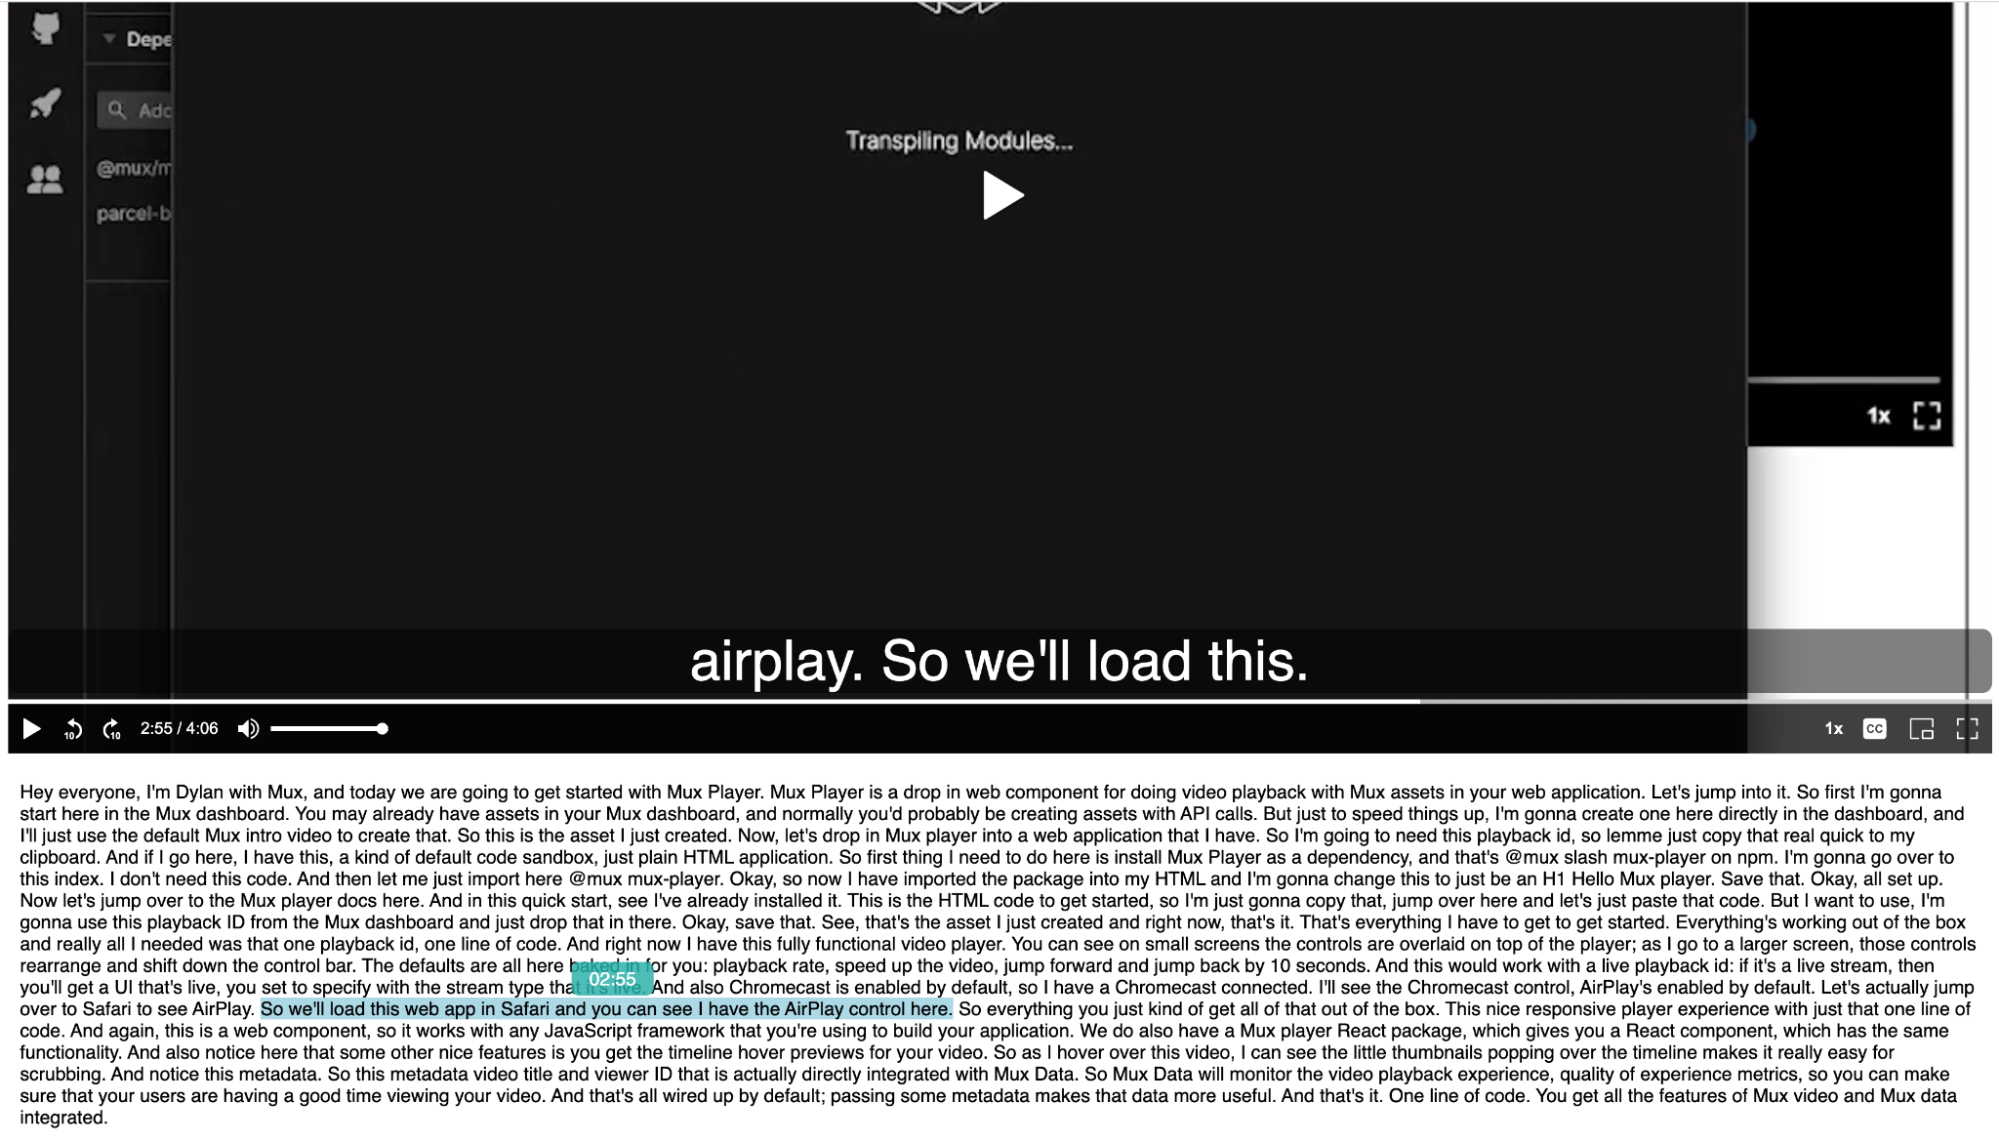
}At this point, your app should look something like this:

Seeking with our transcript
Now that we have a UI to show the transcript CuePoints, let’s start wiring up some time-based interactivity. Remember, we want to do two things: seek when clicking on the transcript and show what sentence is currently playing. For the first bit, we still don’t need to wire up our CuePoints (yet!). For now, we need to add some code that will update the currentTime of <MuxPlayer/> when a Transcript CuePoint (i.e., sentence) is clicked.
To keep it simple, we can use the useState hook for our currentTime, initialized to 0 so when we load media, Mux Player’s playback will start at the beginning. It should look something like this:
export default function App() {
  const [currentTime, setCurrentTime] = useState(0);
  return (
    <div className="App">
      <MuxPlayer
        currentTime={currentTime}
        playbackId="jwmIE4m9De02B8TLpBHxOHX7ywGnjWxYQxork1Jn5ffE"
      />
      <TranscriptRenderer
        cuePoints={cuePoints}
      />
    </div>
  );
}
Now, let’s add a callback to pass down so that clicking on a rendered CuePoint will call setCurrentTime. For lists, I tend to implement this sort of thing generically as “selecting” a CuePoint. For our <TranscriptRenderer/> and <TranscriptCuePointRenderer/>, our updated versions should look something like this:
const TranscriptCuePointRenderer = ({
  cuePoint,
  onCuePointSelected = () => {}
}: {
  cuePoint: CuePoint;
  onCuePointSelected?: (cuePoint: CuePoint) => void;
}) => {
  const { value, time } = cuePoint;
  return (
    <span
      className="transcript-cuepoint"
      onClick={() => onCuePointSelected(cuePoint)}
    >
      {value}
      <span className="tooltiptext">{formatTime(time)}</span>
    </span>
  );
};
const TranscriptRenderer = ({
  cuePoints = [],
  onCuePointSelected = () => {}
}: {
  cuePoints: CuePoint[];
  onCuePointSelected?: (cuePoint: CuePoint) => void;
}) => {
  return (
    <div className="transcript">
      {cuePoints.map((cuePoint, i) => {
        const spacer = i < cuePoints.length - 1 ? " " : "";
        return (
          <Fragment key={cuePoint.time}>
            <TranscriptCuePointRenderer
              onCuePointSelected={onCuePointSelected}
              cuePoint={cuePoint}
            />
            {spacer}
          </Fragment>
        );
      })}
    </div>
  );
};
Now we can update the currentTime using the newly added callback in our simple app, which should look something like this:
export default function App() {
const [currentTime, setCurrentTime] = useState(0);
return (
<div className="App">
<MuxPlayer
currentTime={currentTime}
playbackId="jwmIE4m9De02B8TLpBHxOHX7ywGnjWxYQxork1Jn5ffE"
/>
<TranscriptRenderer
cuePoints={cuePoints}
onCuePointSelected={({ time }) => setCurrentTime(time)}
/>
</div>
);
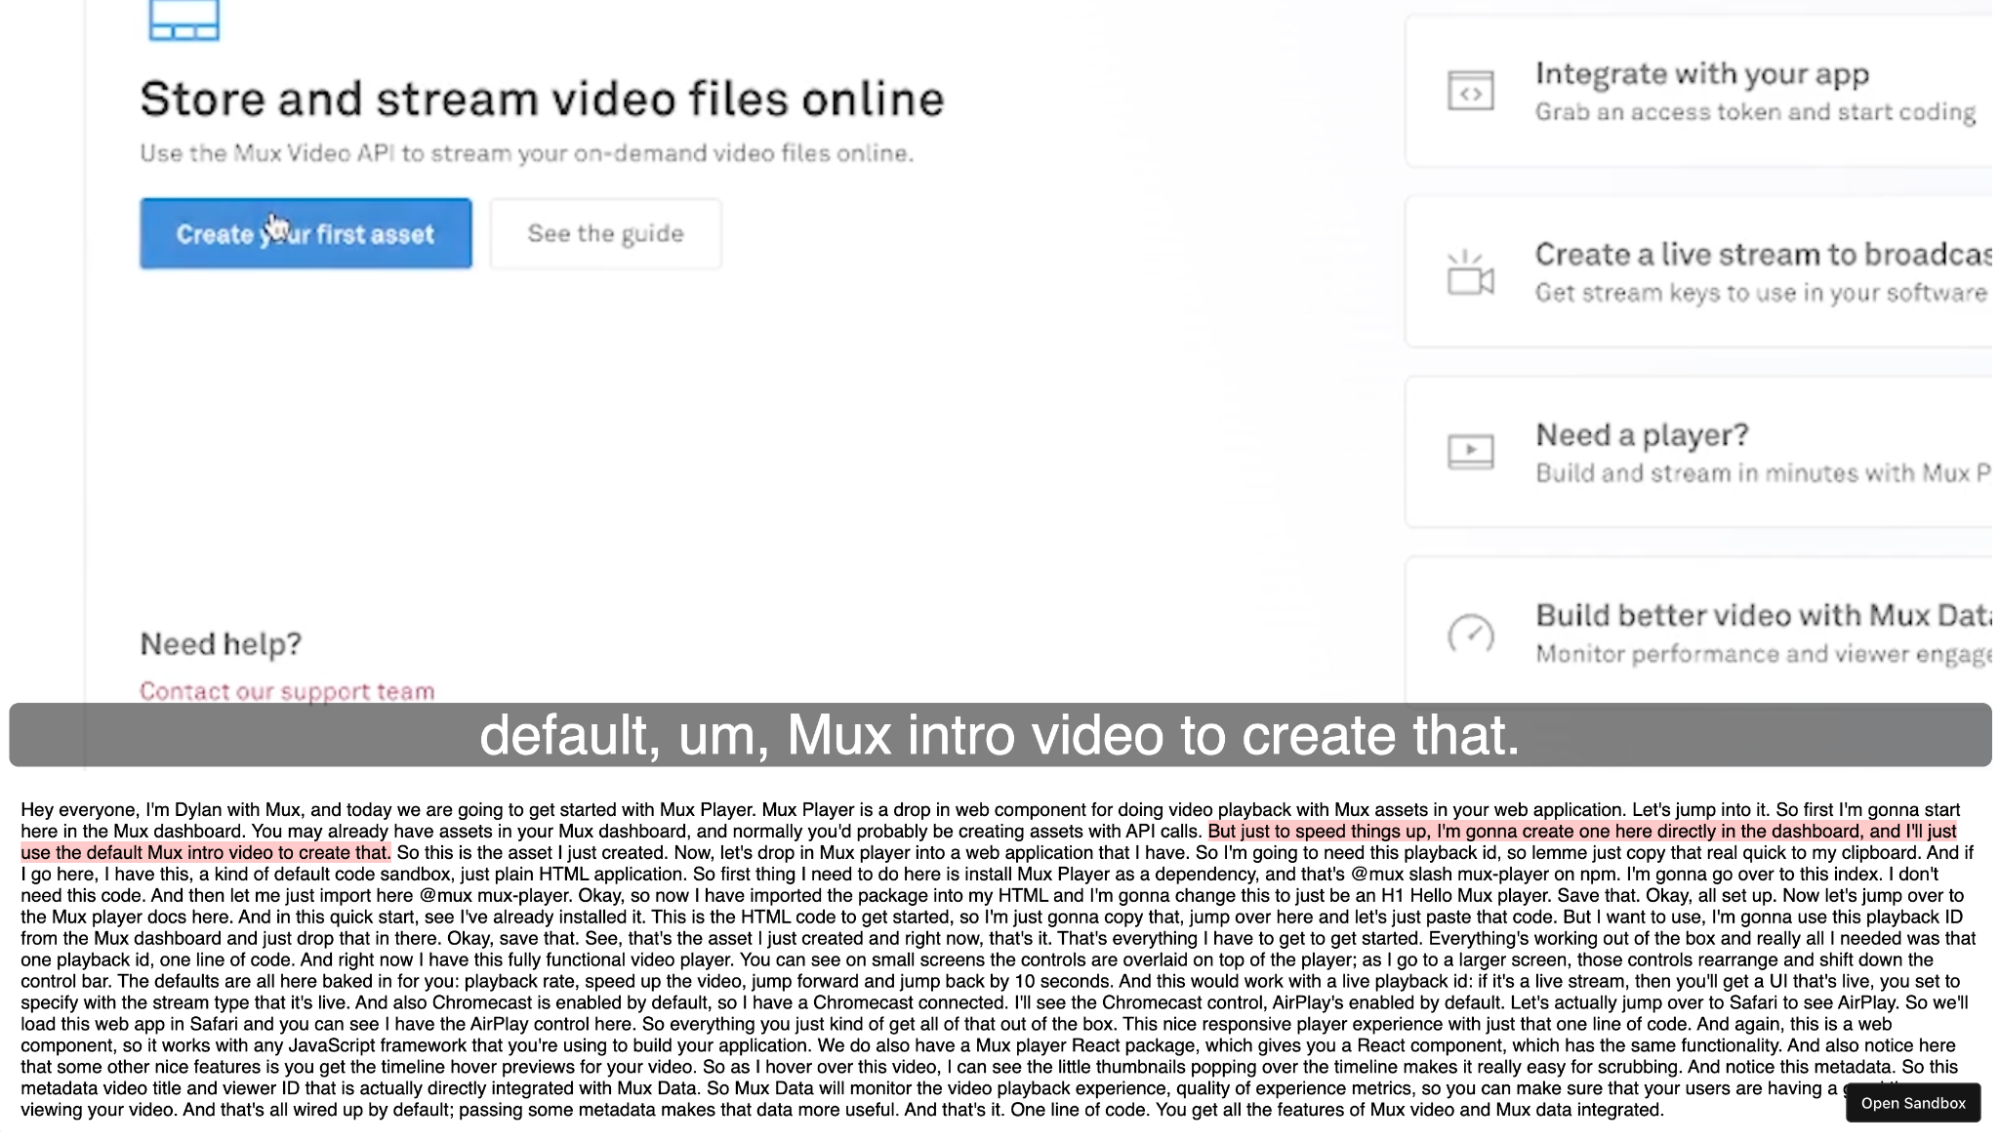
}With everything put together, you’ll be able to seek in the video by clicking on the rendered transcript. For example, if you begin playback and then click another part of the transcript, you should see something like this:
Indicating the active transcript CuePoint
We’re finally at a point where we’ll start integrating CuePoints into Mux Player. For now at least, we will have to rely on the addCuePoints() method on the under-the-hood <mux-player> web component that the React version is built on top of. Additionally, you’ll need to wait until the video has started loading in Mux Player. To do this, add an onLoadedMetadata callback, which corresponds to the native loadedmetadata Event. To get some type safety, we’ll go ahead and import the TypeScript definition of the <mux-player> web component instance while we’re at it.
import type MuxPlayerElement from '@mux/mux-player';
// ...

<MuxPlayer
  playbackId="jwmIE4m9De02B8TLpBHxOHX7ywGnjWxYQxork1Jn5ffE"
  thumbnailTime={currentTime}
  currentTime={currentTime}
  onLoadedMetadata={({ target }) => {
    const playerEl = target as MuxPlayerElement;
    playerEl.addCuePoints(cuePoints);
  }}
/>
Now that we’ve got our CuePoints added, let’s get things in place for keeping track of and reacting to the currently playing CuePoint, called the “active” CuePoint. This will be similar to what we did for currentTime, only with the information flowing in the other direction. Like before, we’ll want to add some state to model the activeCuePoint.
const [activeCuePoint, setActiveCuePoint] = useState<CuePoint | undefined>();And then we’ll want to monitor Mux Player for whenever the active CuePoint changes so we can update the state. This is as simple as adding an onCuePointChange callback, which conveniently provides the activeCuePoint as a detail of the event, so your Mux Player usage would look something like this:
<MuxPlayer
  playbackId="jwmIE4m9De02B8TLpBHxOHX7ywGnjWxYQxork1Jn5ffE"
  thumbnailTime={currentTime}
  currentTime={currentTime}
  onCuePointChange={({ detail }) => {
    setActiveCuePoint(detail);
  }}
  onLoadedMetadata={({ target }) => {
    const playerEl = target as MuxPlayerElement;
    playerEl.addCuePoints(cuePoints);
  }}
/>
On the transcript rendering side, like our callback before, we’ll need to pass down whether a given <TranscriptCuePointRenderer/> is the “active” CuePoint and then style it to indicate that it’s active, which we’ll do with a different background color. Your updated <TranscriptCuePointRenderer/> should look something like this:
const TranscriptCuePointRenderer = ({
  cuePoint,
  onCuePointSelected = () => {},
  active = false
}: {
  cuePoint: CuePoint;
  onCuePointSelected?: (cuePoint: CuePoint) => void;
  active?: boolean;
}) => {
  const { value, time } = cuePoint;
  return (
    <span
      className={`transcript-cuepoint${active ? " active" : ""}`}
      onClick={() => onCuePointSelected(cuePoint)}
    >
      {value}
      <span className="tooltiptext">{formatTime(time)}</span>
    </span>
  );
};
And the simple CSS update will look like this:
.transcript-cuepoint.active {
  background-color: #fecaca;
}
The updated <TranscriptRenderer/> needs to determine if the CuePoint matches the activeCuePoint and pass that along, so it will look something like this:
const TranscriptRenderer = ({
  cuePoints = [],
  onCuePointSelected = () => {},
  activeCuePoint
}: {
  cuePoints: CuePoint[];
  onCuePointSelected?: (cuePoint: CuePoint) => void;
  activeCuePoint?: CuePoint;
}) => {
  return (
    <div className="transcript">
      {cuePoints.map((cuePoint, i) => {
        const spacer = i < cuePoints.length - 1 ? " " : "";
        const active = cuePoint.time === activeCuePoint?.time;
        return (
          <Fragment key={cuePoint.time}>
            <TranscriptCuePointRenderer
              onCuePointSelected={onCuePointSelected}
              cuePoint={cuePoint}
              active={active}
            />
            {spacer}
          </Fragment>
        );
      })}
    </div>
  );
};
And finally, you need to pass the activeCuePoint down. The final form of the App should look something like this:
export default function App() {
  const [activeCuePoint, setActiveCuePoint] = useState<CuePoint | undefined>();
  const [currentTime, setCurrentTime] = useState(0);

  return (
    <div className="App">
      <MuxPlayer
        playbackId="jwmIE4m9De02B8TLpBHxOHX7ywGnjWxYQxork1Jn5ffE"
        thumbnailTime={currentTime}
        currentTime={currentTime}
        onCuePointChange={({ detail }) => {
          setActiveCuePoint(detail);
        }}
        onLoadedMetadata={({ target }) => {
          const playerEl = target as MuxPlayerElement;
          playerEl.addCuePoints(cuePoints);
        }}
      />
      <TranscriptRenderer
        activeCuePoint={activeCuePoint}
        cuePoints={cuePoints}
        onCuePointSelected={(cuePoint) => setCurrentTime(cuePoint.time ?? 0)}
      />
    </div>
  );
}
Once all of this is done, you should see something like this in the running application:
And that’s it! You now have a fully working, interactive transcript renderer.
Getting creative with CuePoints
Now that you’ve built a basic but (mostly) real-world use case for CuePoints, I hope your creative juices are flowing for the kinds of immersive, interactive, and contextualized media-centric experiences you can unlock with this functionality. In case you need just a bit more inspiration, here are a couple more examples:
- The complete working transcript example from this blog post (found here)
- A simple example of question prompts using CuePoints from Dave Kiss (found here)
- Adjusting your meditation time using a recorded guided meditation with CuePoints (found here)
Note how different each use case is, yet they can all be built using this same generic functionality. Keep this in mind as you’re thinking about potential features or experiences you may want to build.
This feature is still fairly new and fairly basic, so if you feel like a certain feature or functionality is missing, or even if you have a suggestion for better “developer ergonomics,” send a request our way!