Implementing end-to-end direct uploads is a multistep process. Luckily, we’re here with you every step of the way to help you succeed. For example, in a previous blog post, we helped you direct upload a video from your local machine via an upload button built with React and an Express server on the backend. Here, we’ll help you navigate verifying your direct upload with webhooks in a local development environment. There can be a few gotchas while testing if you’re unfamiliar with the process.
Prerequisites
- A Mux account
- API keys for Mux Video
- Homebrew
This post can help you out in either of these circumstances:
- You already have an interface available to trigger a direct upload, along with a server that can be set up with an endpoint for webhooks, but you’re having difficulty with the webhooks portion of the process.
- You don’t have a project yet, but you want to learn about webhooks as they relate to direct uploads (you can use our starter repo and follow the instructions in the README for running the final project 💪🏻).
If you do have your own project set up and want assistance testing with webhooks, skip to the section on webhooks vs. polling below. Otherwise, continue on to set up your webhooks server-side.
Create a server endpoint for webhooks
Webhooks—also known as reverse APIs—are a way to let consuming applications know that an event has occurred. From there, you can control what happens next (sending an email, creating a new row in a database, etc.). Mux leverages webhooks to send notifications to your app about the latest happenings within your Mux account.
app.post('/webhook', async (req, res) => {
  res.sendStatus(200);
})
This is the endpoint where all Mux webhook events will be sent once we configure the Mux webhook settings later in this post.
Webhooks vs. polling
Let’s talk about the differences between webhooks and polling.
Polling is when you make an API request to determine if there’s new data. Think of polling like calling a store to see if your order is ready for pickup.
Webhooks would be more like the store sending you an email when your order is ready. Who knows how many phone calls—or in this case, API calls—you’d have to make otherwise!
You might’ve noticed that webhooks and polling are both used to detect changes in data. When you want to verify a direct upload, instead of spending time polling (and dealing with barriers such as rate limits), you can rely on Mux webhooks. Once the direct upload video asset is ready, Mux webhooks will send a POST request to the /webhook endpoint you added into your server above. This endpoint will also receive requests for other related events, meaning you’ll be alerted to all updates in the workflow.
That said, not everyone is familiar with webhooks, and testing webhooks can be a little tricky in a local development environment. Let’s walk you through this workflow to make the experience more enjoyable. ✨
Prepare webhooks locally by creating a tunnel
If you’re new to webhooks, you’ll eventually run into a roadblock: webhooks can only communicate with public URLs. In order to test webhooks locally, we have to create a tunnel to expose local ports.
For the purposes of this article, we’ll do this with Cloudflare Tunnels.
To get started, install the Cloudflare CLI.
If you’re on a Mac, like me, you can follow the commands listed below. Otherwise, you can download it directly.
In any terminal, run the following:
brew install cloudflare/cloudflare/cloudflaredNext, run this command with your server’s localhost port:
cloudflared tunnel --url http://localhost:3001/
You will then see a message that looks something like this:
Your quick Tunnel has been created! Visit it at (it may take some time to be reachable):  |
2022-02-15T20:41:52Z INF |  https:/fake-public-url.trycloudflare.com
There you go! Now you have a public URL through which you will hit your /webhook endpoint. Using this free service, this URL won’t persist, but that should be fine for your testing purposes.
Just remember that when you terminate the tunnel, it will not be usable again! You will need to run the command again to create a new public URL to use as a tunnel.
Set up Mux webhooks
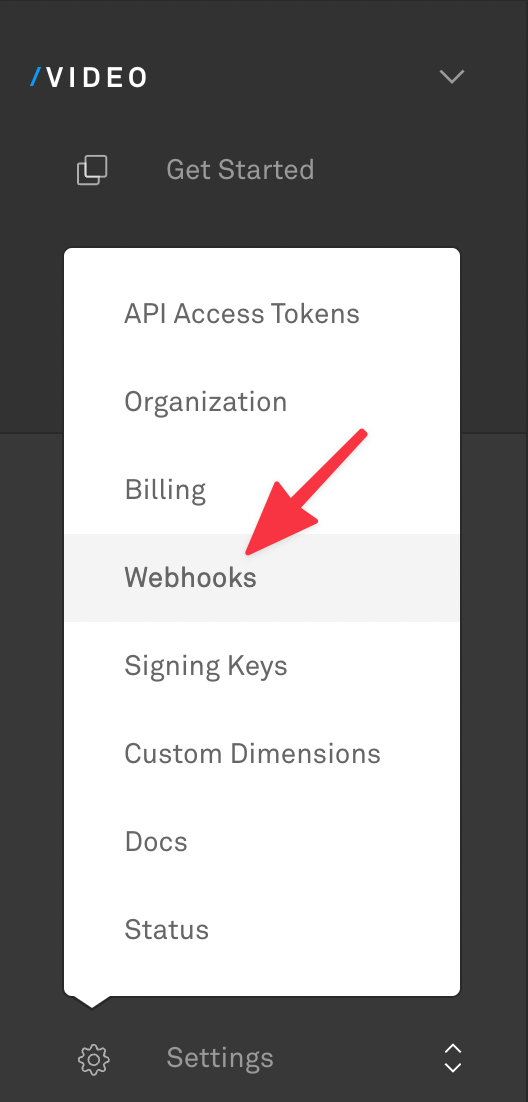
Now that you have a public URL for your tunnel, let’s set up webhooks on the Mux side. First, sign in to your Mux account to bring up the Mux Dashboard. Click “Settings” in the left-hand sidebar and select “Webhooks.”
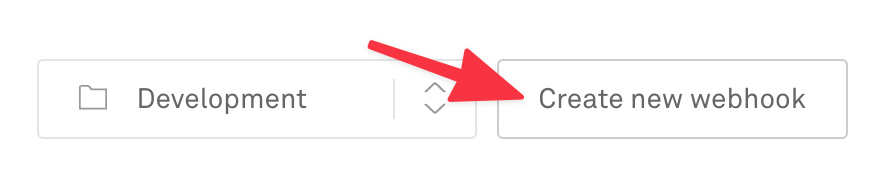
Next, click “Create new webhook” on the right side of the screen.
Paste your Cloudflare URL along with your /webhook endpoint at the end. It will look like this:
https:/fake-public-url.trycloudflare.com/webhookVerify video upload via webhooks
Now that you have that set up, click your upload button in your application, select a video, and let’s see if it worked!
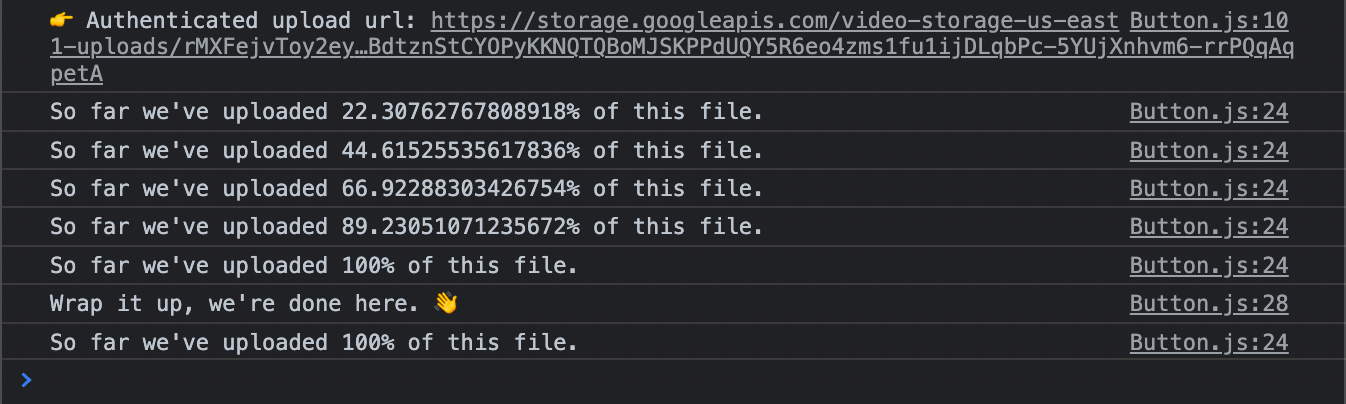
1) Observe starter repo’s browser console logs (optional)
Note: If you like seeing progress as you go along, and if you’re using Mux’s starter repo, open your browser console and watch the upload. With the way we’ve set up Upchunk, you’ll get logs here as the file uploads. If you’re using your own project, move on to step 2.
2) Observe terminal window where server is running
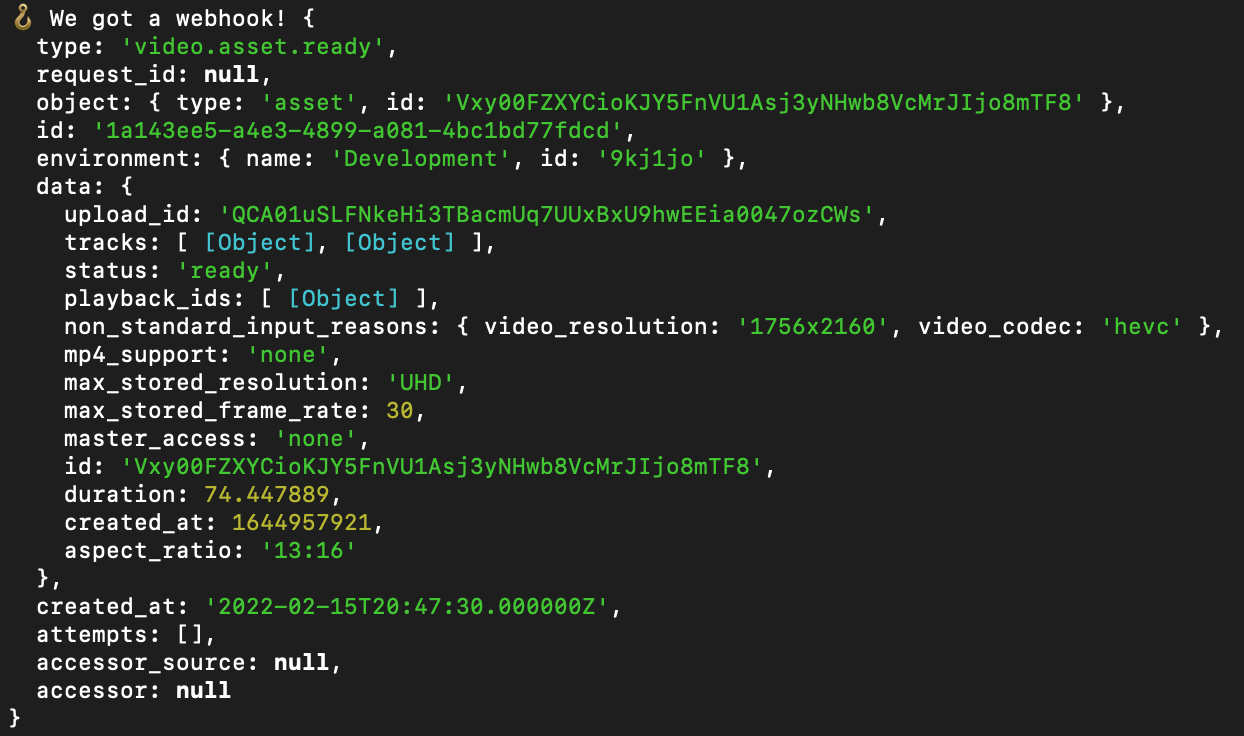
Open the terminal where you have your server running. As your video uploads directly to Mux, you’ll see several webhooks. One is for when the upload is created. Another is when the video asset itself is ready. You can also view all related API activity in the Mux Dashboard under Settings > API Activity. The most recent event will be listed at the top.
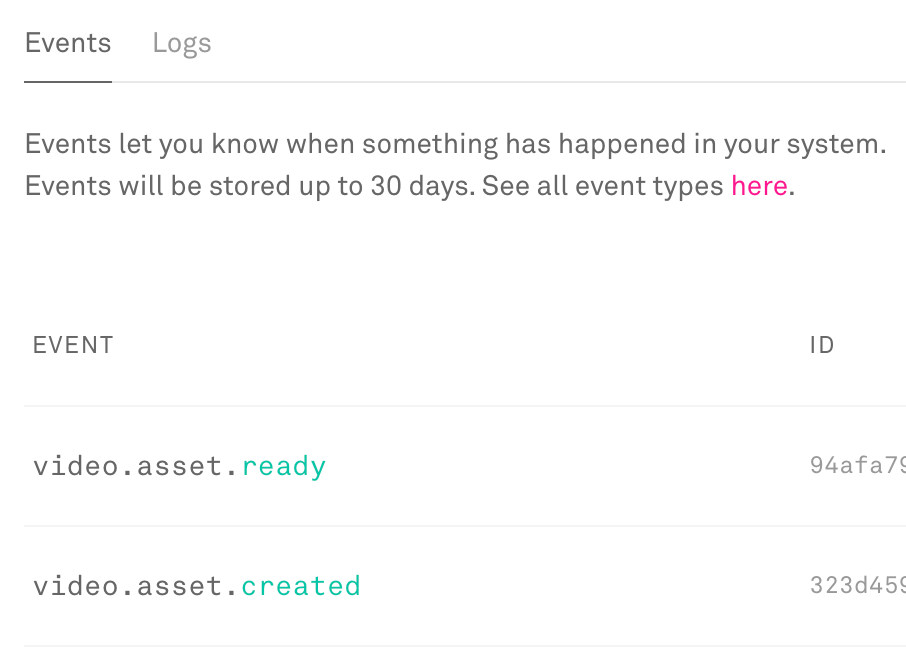
The following Mux webhooks are triggered during direct uploads:
- video.upload.created
- video.upload.asset_created
- video.asset.created
- video.asset.ready (an example of what this webhook being fired looks like is in the screenshot below)
You can check the type property and react accordingly based on the type of webhook being sent.
Did you see the beacon get lit your webhooks or API activity come through? ✅
You did? Sweet! Congratulations—you’ve successfully uploaded a video and verified it with webhooks. ✨