Online conferences seem to have gained in popularity the past year. We’re seeing more and more folks reach out with questions around best practices and how to pull off their remote conference. Sometimes, people will announce a conference, get thousands of sign ups and then one or two weeks before it’s set to go live they will be figuring out how to do it; how much different from a normal video conference call could it be? For our purposes let’s say you want to build a custom experience and host an online conference on your website.
Use this guide as your playbook. This is what we will cover:
- You have multiple presenters that will be broadcasting live from different locations.
- Your team has no video expertise at all, but you do have a technical team that is capable of building a functioning web application.
- The experience you want to provide to your audience is something custom that you control. Your brand is important for you and you want to control the look, feel and user experience of the conference.
- To broaden the reach of your conference you simultaneously want to broadcast out the video feed to social channels like Youtube Live, Facebook Live, and Periscope.
- If possible, you would like to have a branded overlay with your logo on the video.
- In addition to streaming live, you want to record the broadcast so that people who did not attend live can view the recordings on-demand as soon as each session is over.
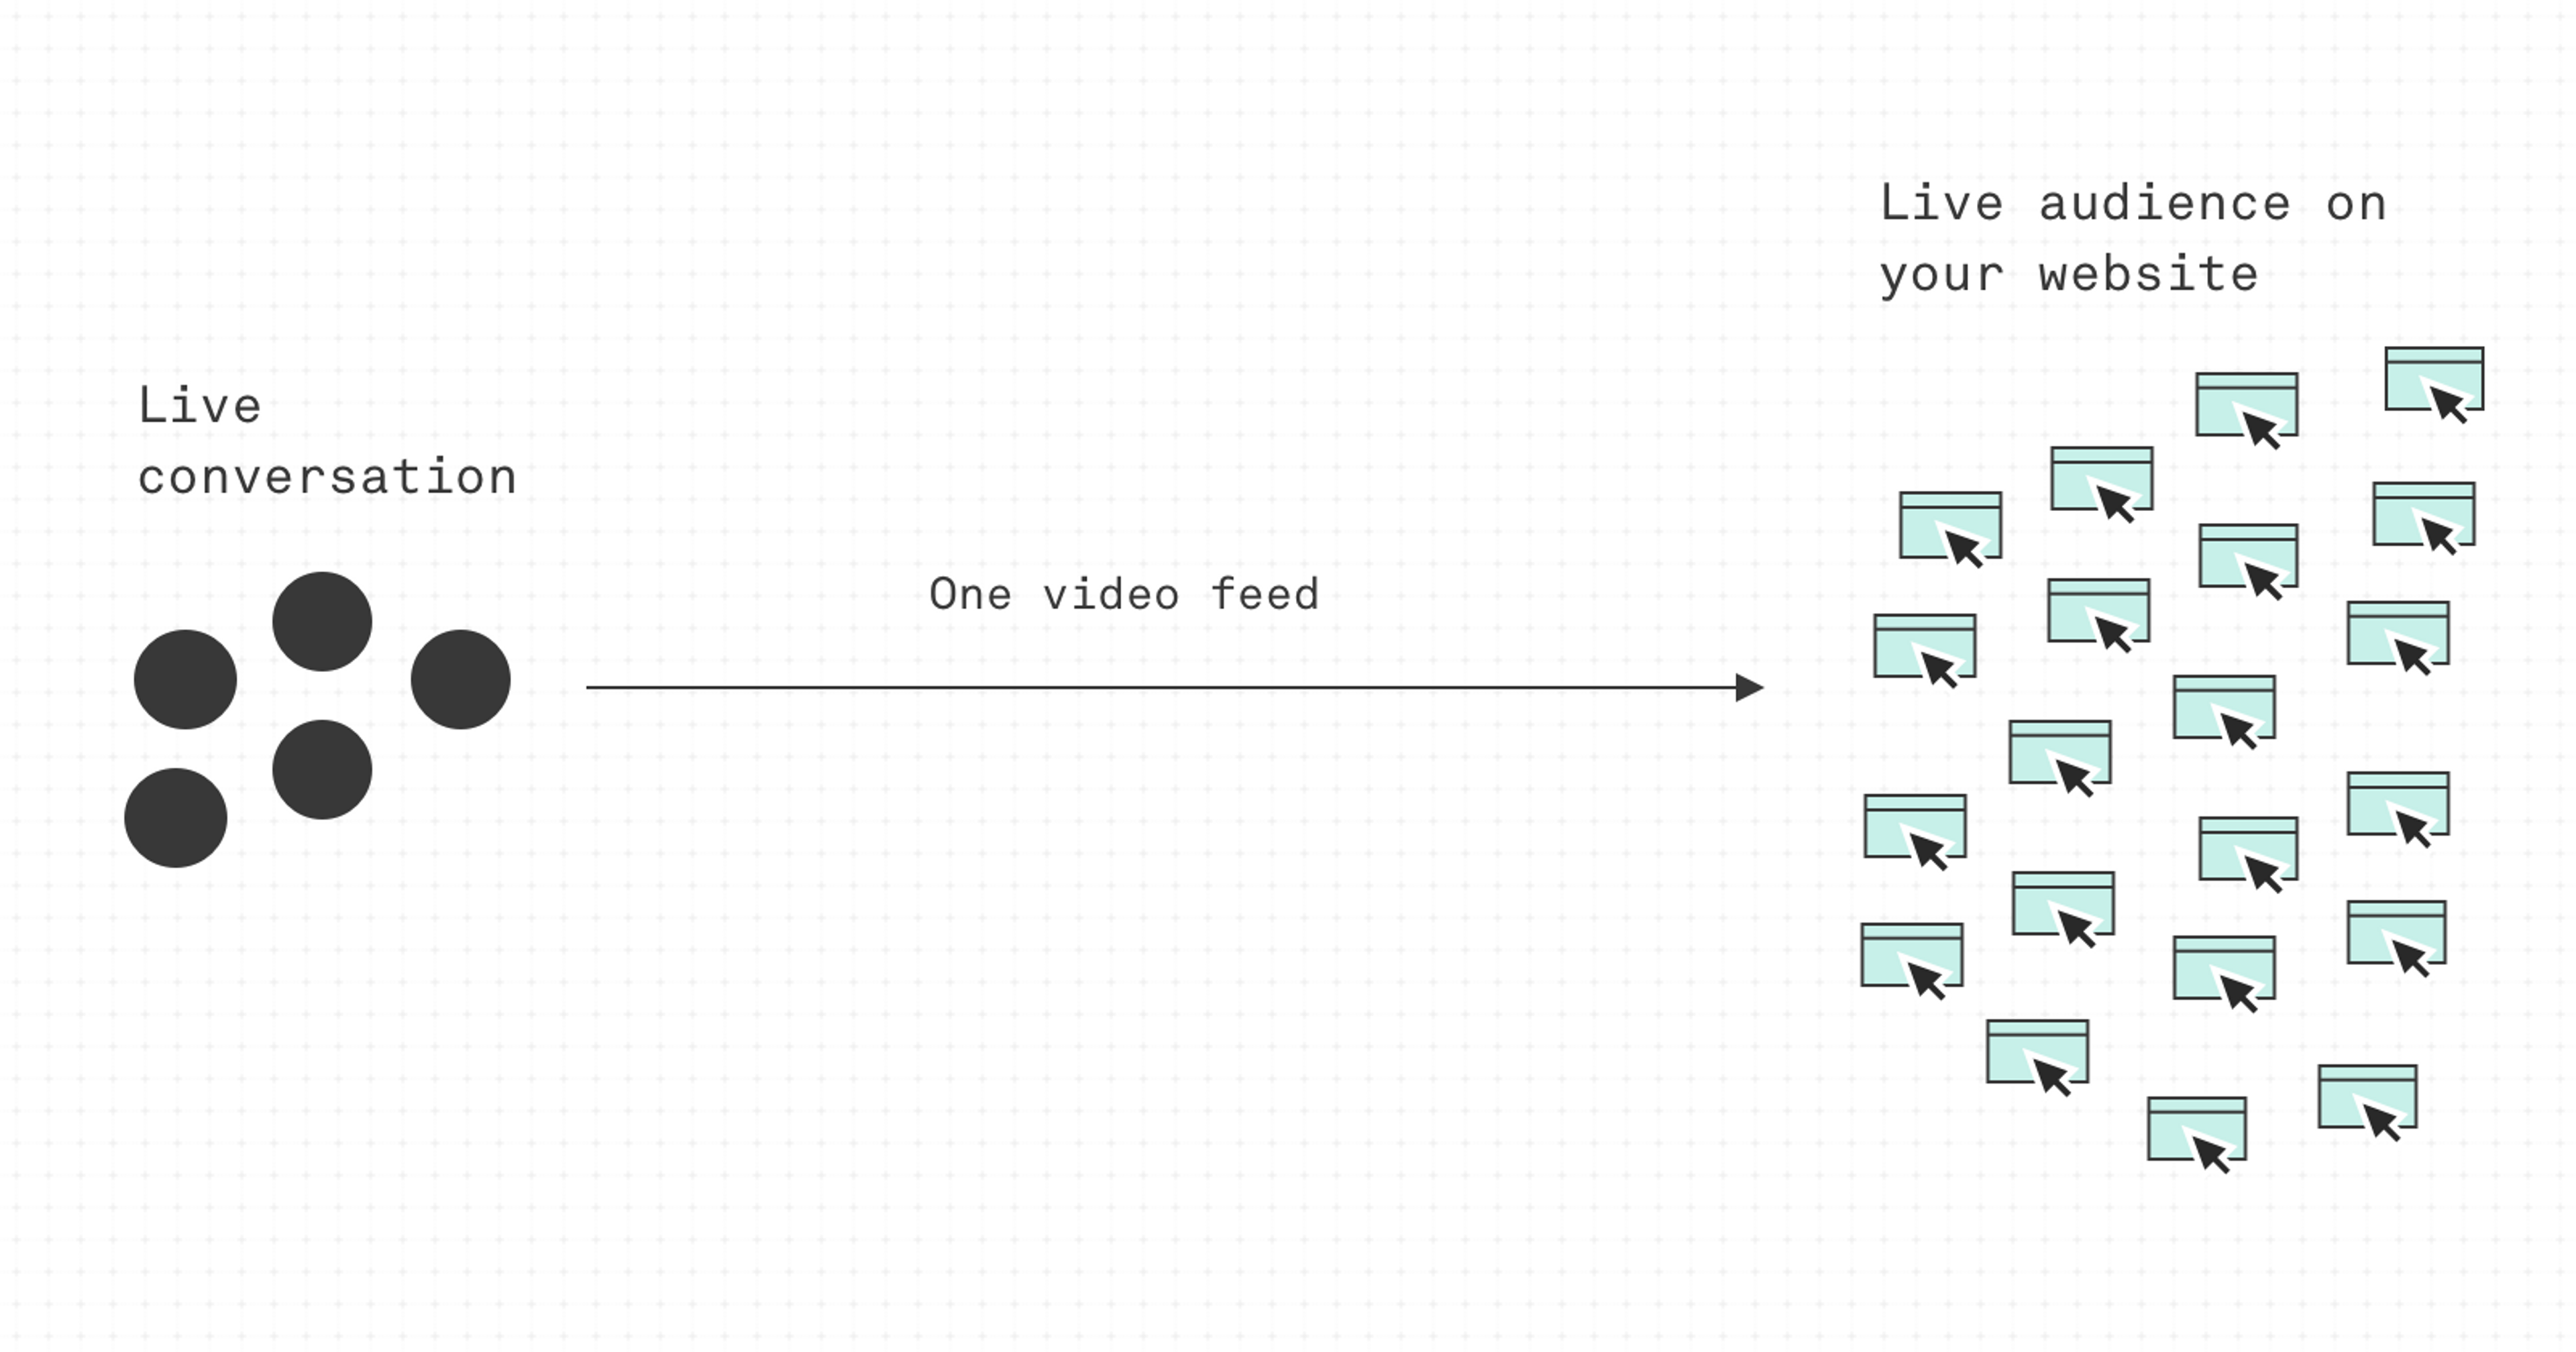
The basic structure of your setup is going to be a live conversation that is broadcast to a larger group of live viewers. The live conversation could be something like one person presenting with a screen share, or one person interviewing someone else, or a panel discussion among a group of experts.
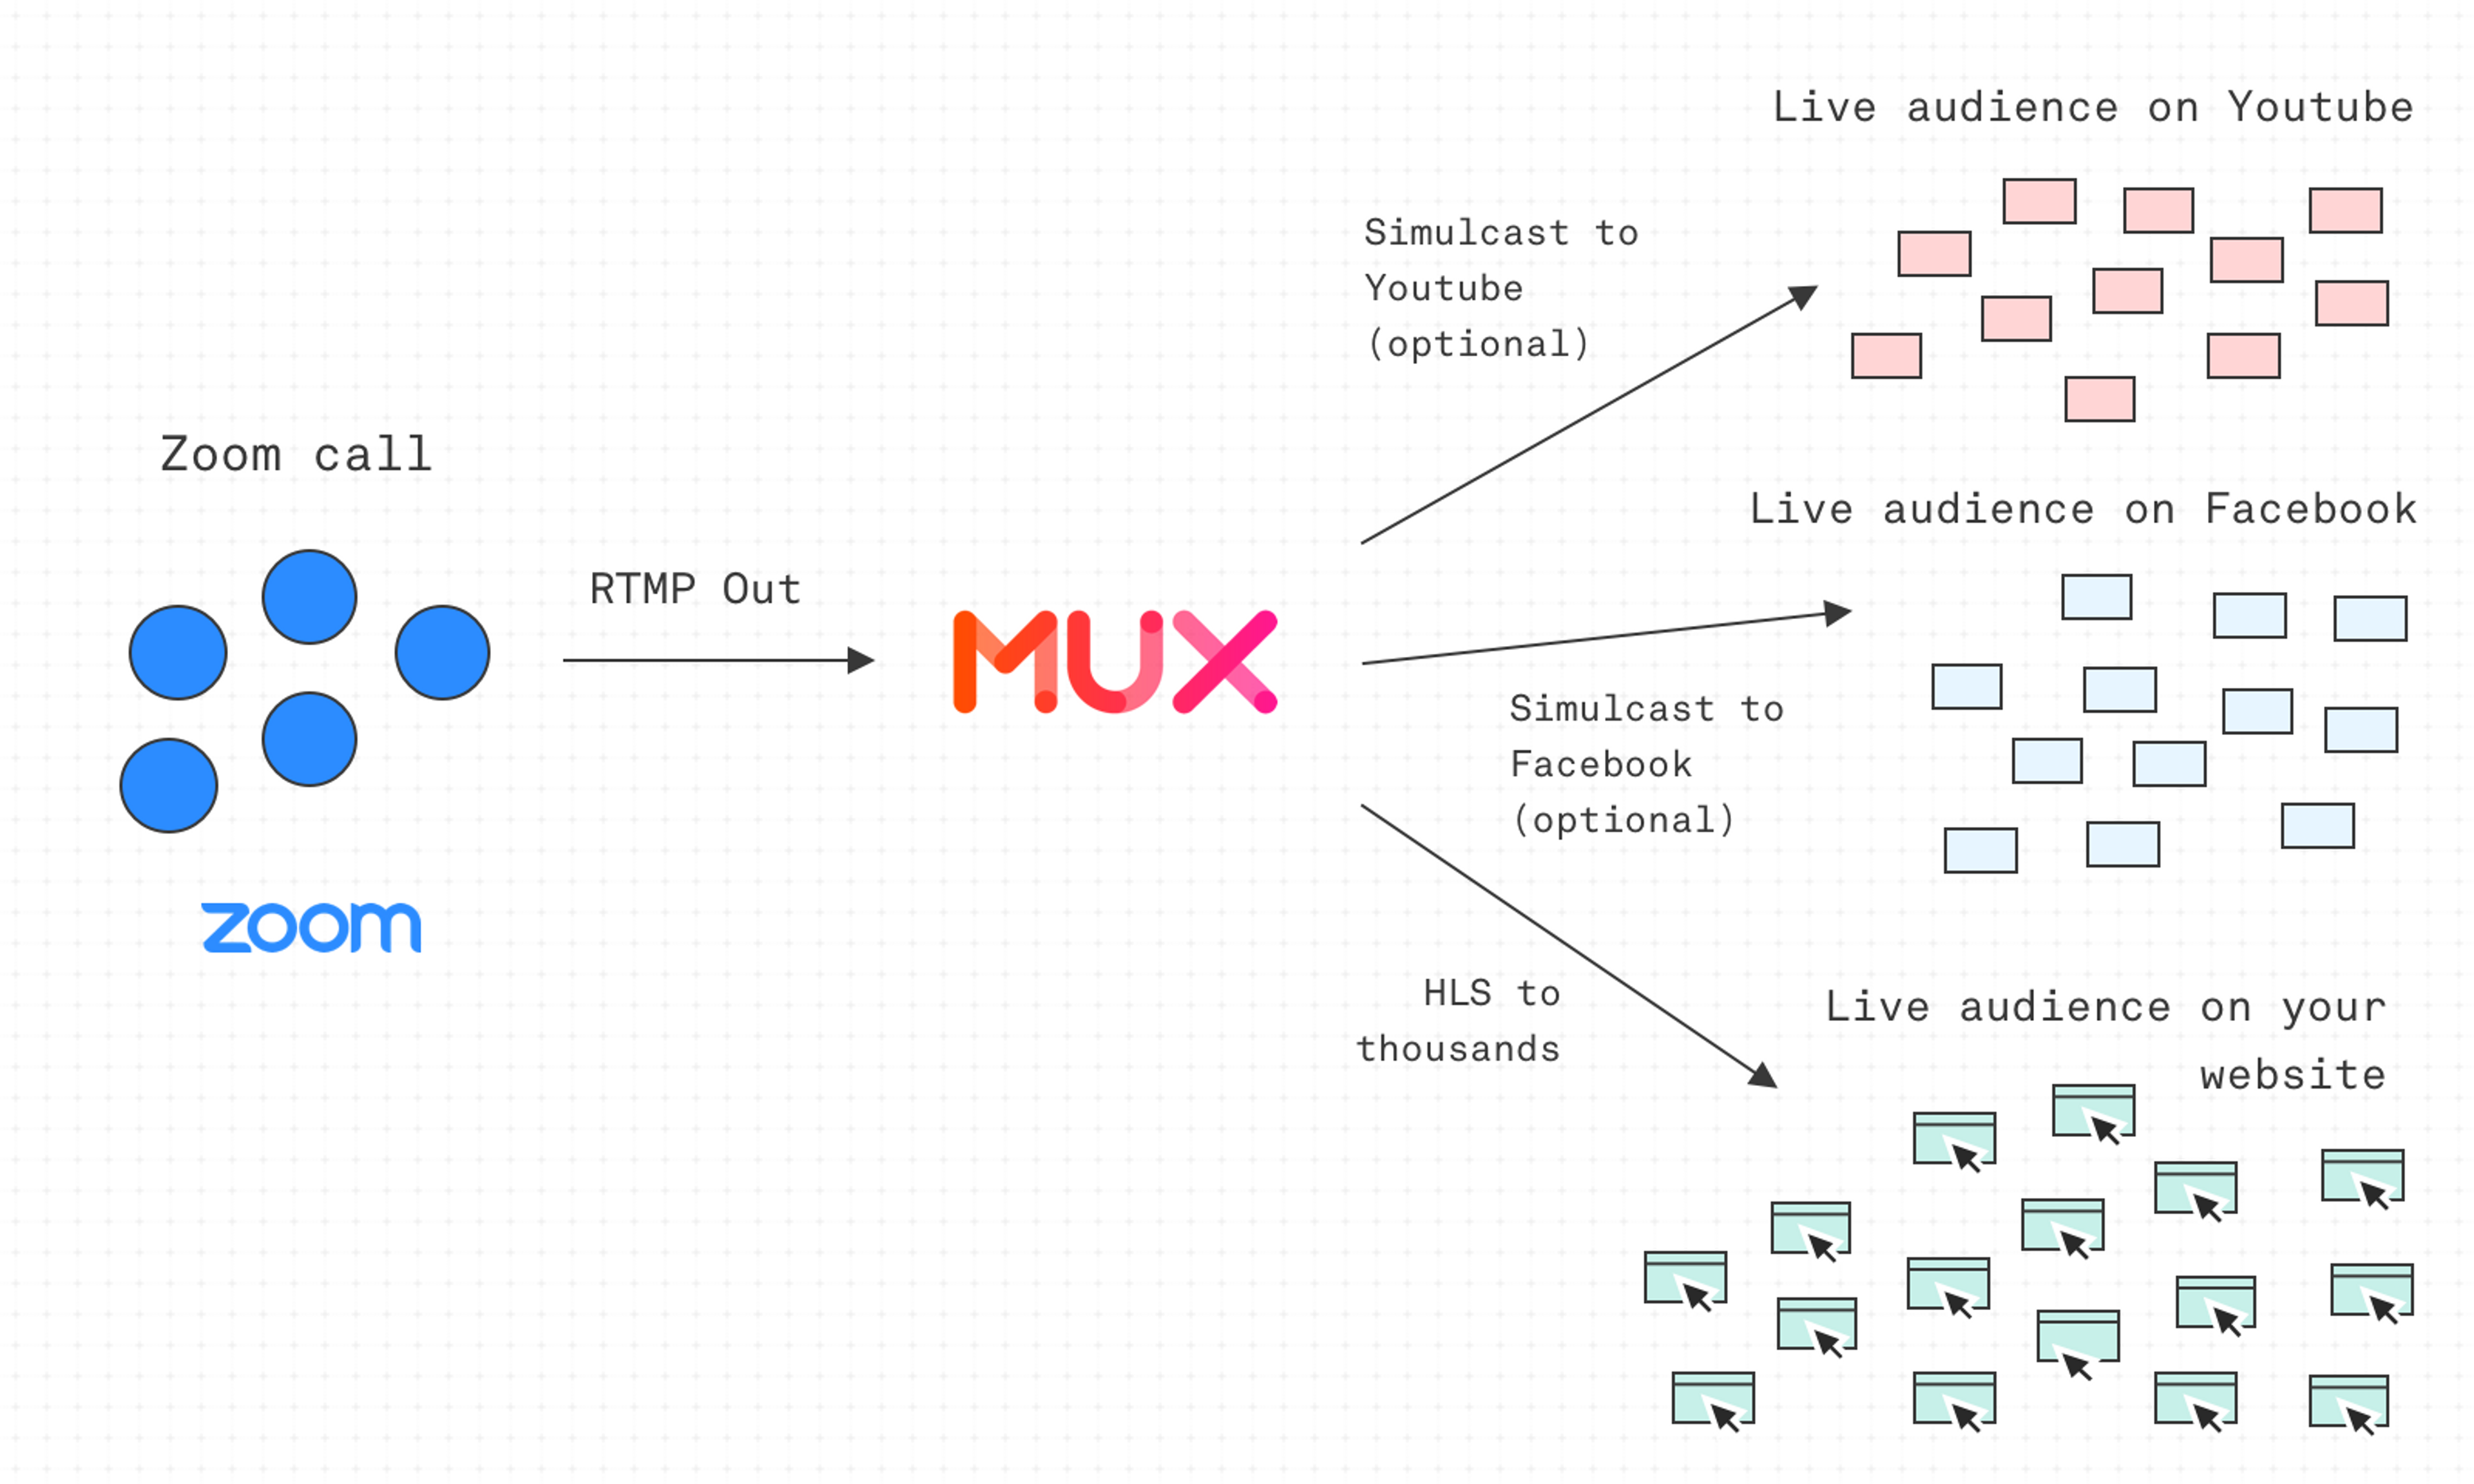
A really simple way to do this live conversation is to use Zoom. Most people are familiar with Zoom. It is one of the most stable, reliable and high-quality pieces of meeting software around and it runs natively on your desktop. What’s cool about Zoom is that if you enable live streaming for meetings then you can set up an RTMP output for your Zoom call to any arbitrary RTMP endpoint (this is where Mux comes in).
Adding Mux in the middle is how you can broadcast your Zoom call to an audience of thousands on your own website. The live audience does not have to download Zoom, they do not interact with Zoom at all. All they do is see a video player that you make on your website.
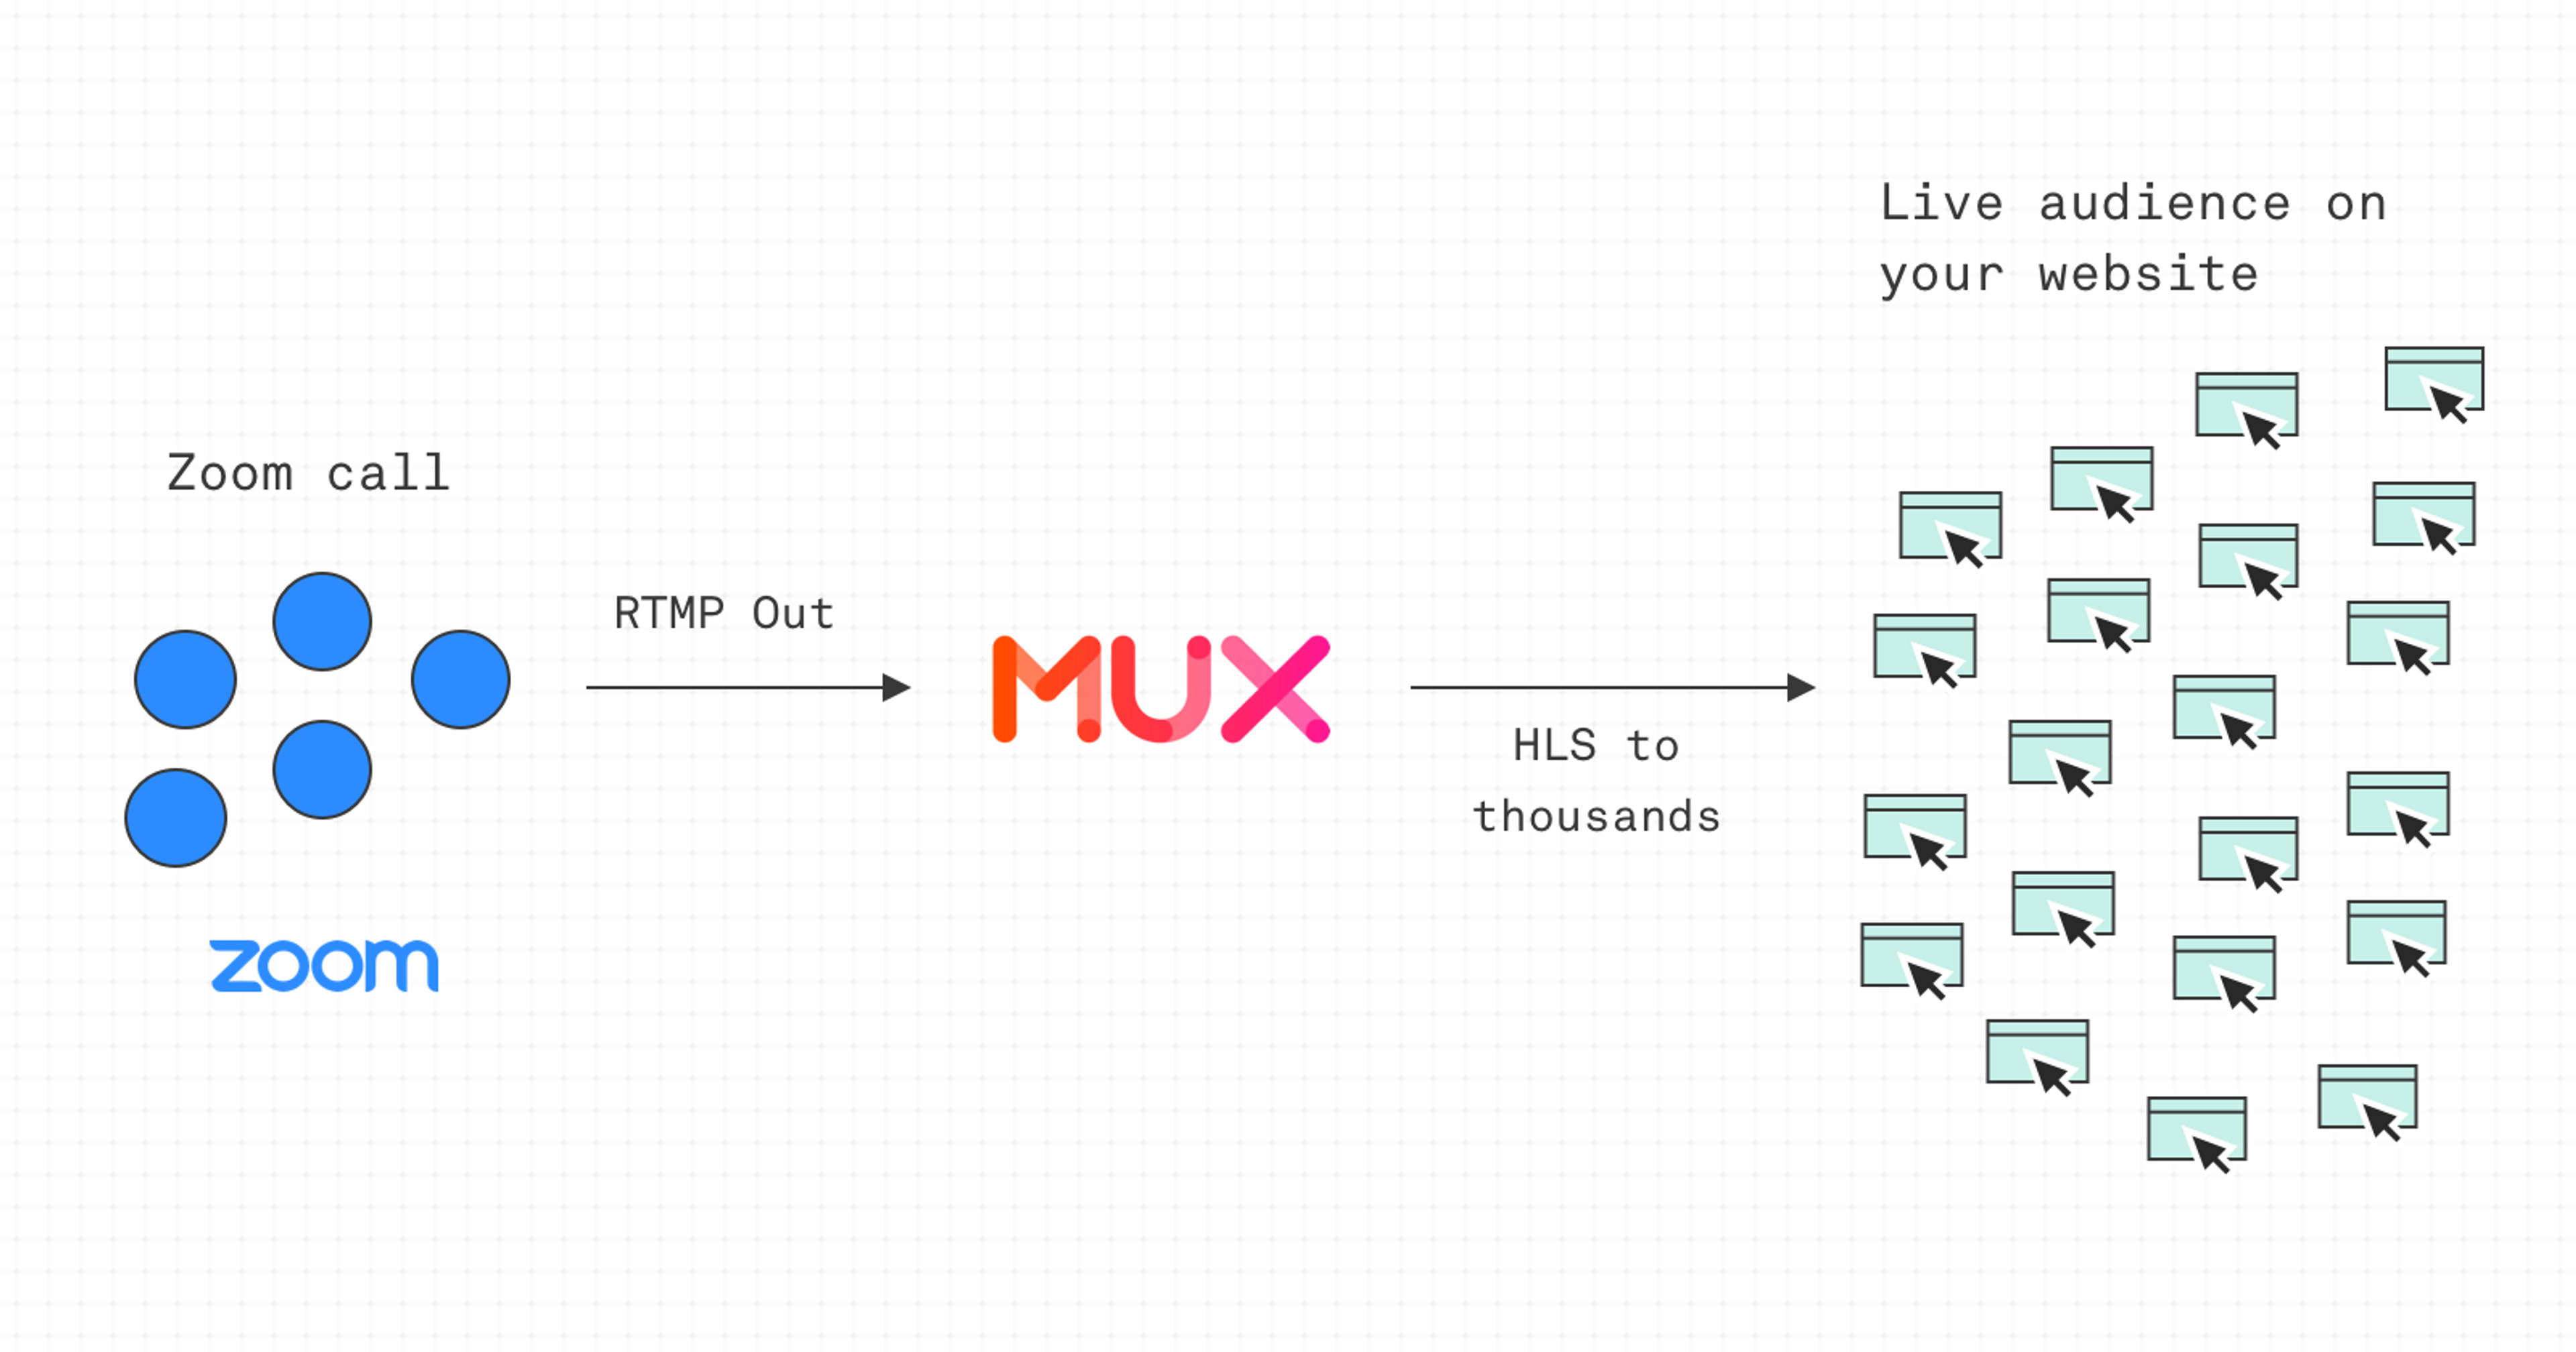
Let’s break down the steps and API calls:
1. Make sure in Zoom settings you have allowed meetings to be live streamed.
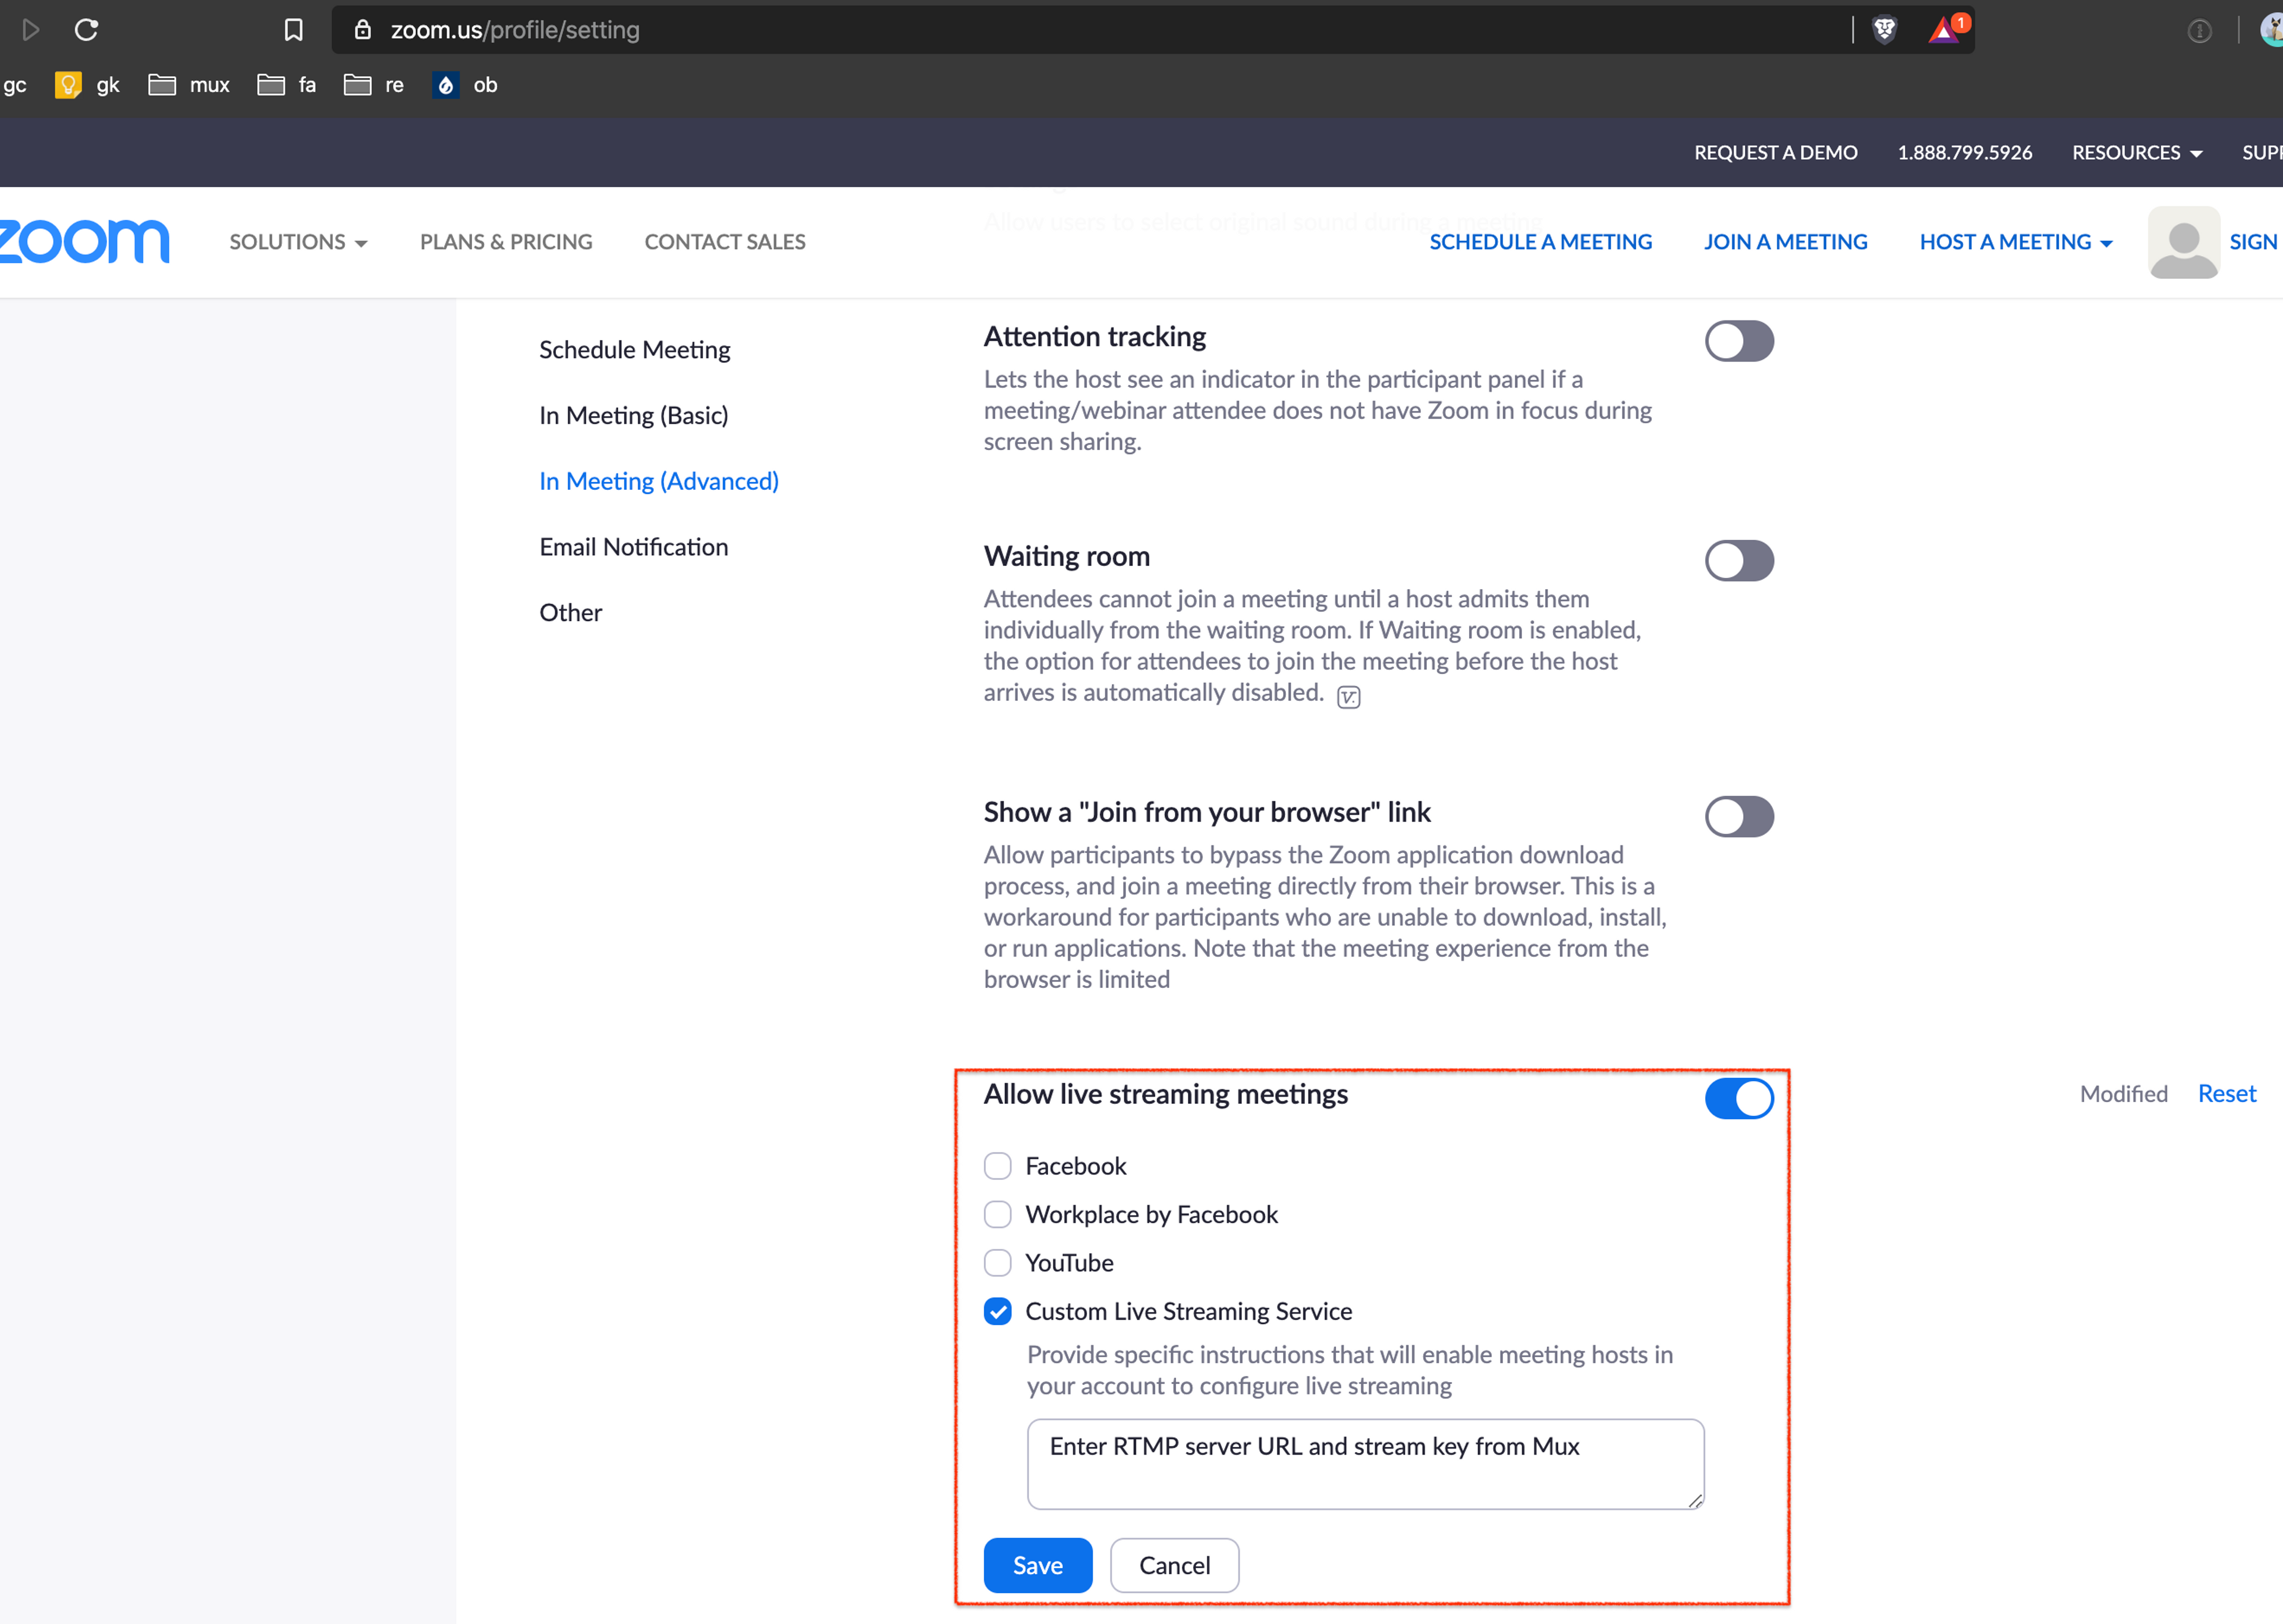
2. Create a Mux live stream - this is one API call and for every live stream, you create you will get back a unique stream key also make sure you save a playback_id for this live stream - you will need this to play the live stream.
3. Set up a Zoom call like you normally would. From the call, click the 3 dots at the bottom where it says "More" and click "Live on Custom Live Streaming Service".

4. From here, enter the RTMP server details for Mux.
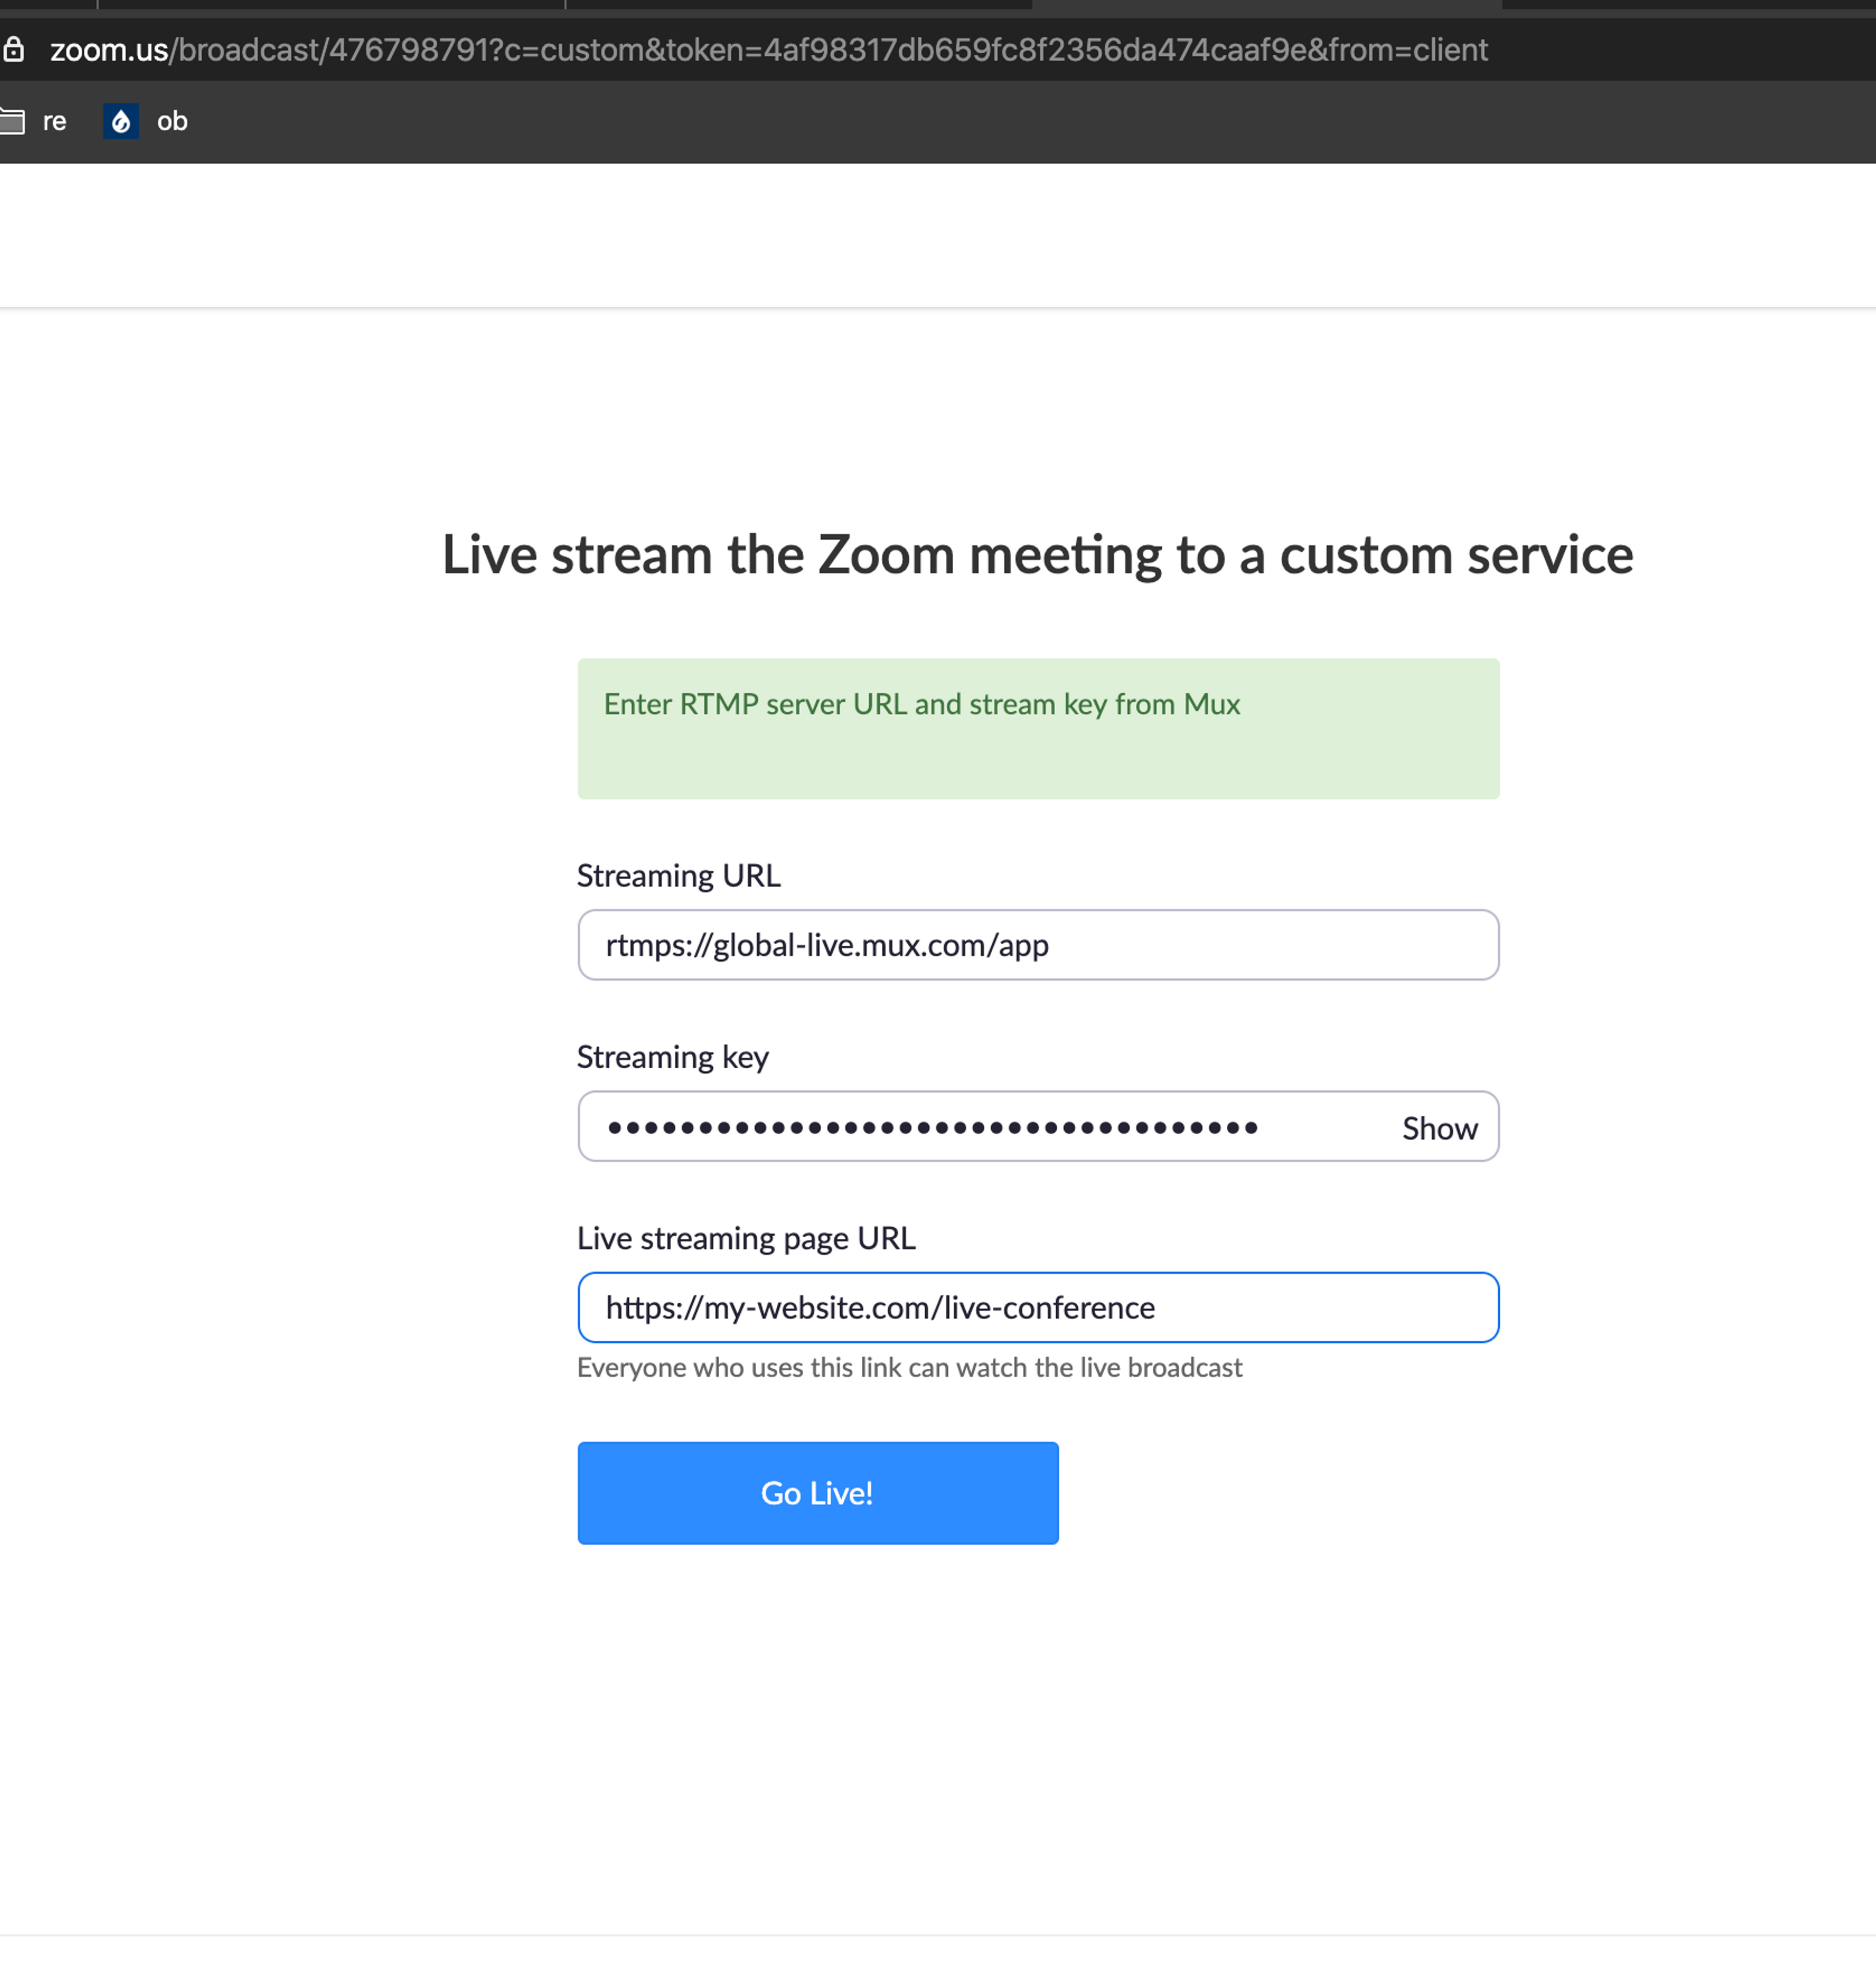
5. When you’re ready to stream click “Go Live!” from Zoom. Now your Zoom call will be live and Mux will start receiving the video and audio. To confirm that this part is working, navigate to the live stream in your Mux dashboard and you should see video and audio coming in. Later you can set up Webhooks so that you can be notified when every live stream is connected, active, completed, etc.
6. Next is the player side, you have the playback_id from step 3, right? You will need to take that ID and form a URL like this: https://stream.mux.com/{playback-id}.m3u8. This is an “m3u8” URL which is a URL for streaming video over HLS. HLS is a standard streaming format for both live and on-demand video. You will need to use this HLS URL in a video player. Which player you choose is entirely up to you. Here are two free ones you can check out to get started: videojs and plyr. With whichever player you choose, follow the instructions for streaming an HLS video.
Note that HLS streaming will come with some latency. Expect for 15-20 seconds, there is a reduced_latency flag that you can use which will bring that number down closer to 8 or 10 seconds (with some tradeoffs). Check the docs here for more information.
Live chat
After you get the live stream of your conference working on your webpage, you will almost certainly want to add a live chat component. Live chat is outside the scope of what Mux offers, but we’ve seen this done in a few different ways:
- Use your own database and push real-time changes to your clients with something like Pusher, PubNub or Socket.IO.
- Use a realtime database like Firebase and build your own chat experience.
- Try something like Stream which offers real-time APIs specifically around creating chat experience. Fully featured with things like uploading images to chat, emoji reactions, typing notifications, and all the bells and whistles are built-in.
- Skip the step of adding chat on your webpage and create a Slack community where everyone can chat. The benefit of having a slack community is that it’s free and you don’t have to go through the steps of building chat onto your website. Most people are already familiar with Slack, so they likely have it downloaded already. You can also create channels for specific topics and allow attendees to DM each other. This has the added benefit of allowing for the kind of attendee networking that happens at in-person conferences.
Everything is recorded
Every live stream that you do will be recorded by Mux and the asset will be available for on-demand playback. After each live stream is over, you can use the Mux asset to give attendees who were not present live the ability to view the recording.
Bonus: simulcast to the socials
When you create a Mux live stream you can optionally add simulcast_targets which are arbitrary RTMP endpoints that Mux will push out your stream to. It’s fairly straightforward and we have some guides on how to do this. Read more in the announcement blog post and the guide. All you have to do is track down the RTMP server URL and stream keys for each of the social networks you want to broadcast to and add them to the Mux live stream with an API call.
Bonus: add a watermark
In the new_asset_settings parameter when you create the live stream, you have the option to specify a watermark. You give Mux the URL to an image you want to use as a watermark and some details about where to place it and how to align it. When this is configured, Mux will add it to the stream that comes from Zoom and the watermark will appear on the HLS stream that you show on your website.
You don’t have to use Zoom
Zoom is the simple example I used here because many people are familiar with it and know how it works. But the reality is you can use any software that allows you to RTMP out to Mux. To name a few other options: OBS, Wirecast, ecamm live, all of these products are built to compose a single video stream and RTMP out to somewhere. All of these will work with Mux.
Final Setup
Here’s what your final setup might look like. If you are going to host an online conference with Mux, please reach out! We would love to talk to you and help you make sure it’s successful.
Extra details if you’re curious
- Mux supports live streams for up to 12 hours. If you have one single stream of an all-day conference then this should be enough.
- There are two options for playing the live stream on your website, you can either use a playback_id associated directly with the live stream, OR you can use the playback_id associated with the active_asset that is associated with the live stream. The former will not allow seeking backward in the stream, the latter will allow your attendees (if they want) to seek all the way back to the beginning. This is a subtle detail but it might be something you want to consider.
If you’re doing an online conference, please get in touch!


