TL;DR
Mux Robots meets Adobe Premier Pro. Video editors can now translate audio, generate captions, generate chapters, find scenes and more with a click of a button thanks to Mux Robots.
Click here to install the plugin
In late July, we sponsored the livestream of the Laravel community dodgeball tournament at Laracon, then handed the recording to our video editor to cut a highlight reel. We also asked our editor to use the Mux Robots Find Key Moments workflow to identify the most compelling plays in each game.
Each Mux Robots workflow produces a JSON output that works well for developers and apps, but it doesn’t do a video editor a lot of good. Sure, the output identified key moments, timestamps and all, but our editor still had to mark each one by hand on the Adobe Premiere Pro timeline. To close that gap, we built the Mux Robots plugin for Adobe Premiere Pro. It automatically adds chapter and key-moment markers, along with translated audio tracks and captions.
The Mux Robots Adobe Premiere Pro plugin
Video editors spend much of their time trimming videos down to the moments that matter, editing captions, and localizing content with the right audio dubs and caption translations. Adobe Premiere Pro is our editor’s tool of choice, and luckily, Adobe’s developer ecosystem for Creative Cloud apps had everything I needed to bring video intelligence to Premiere Pro.
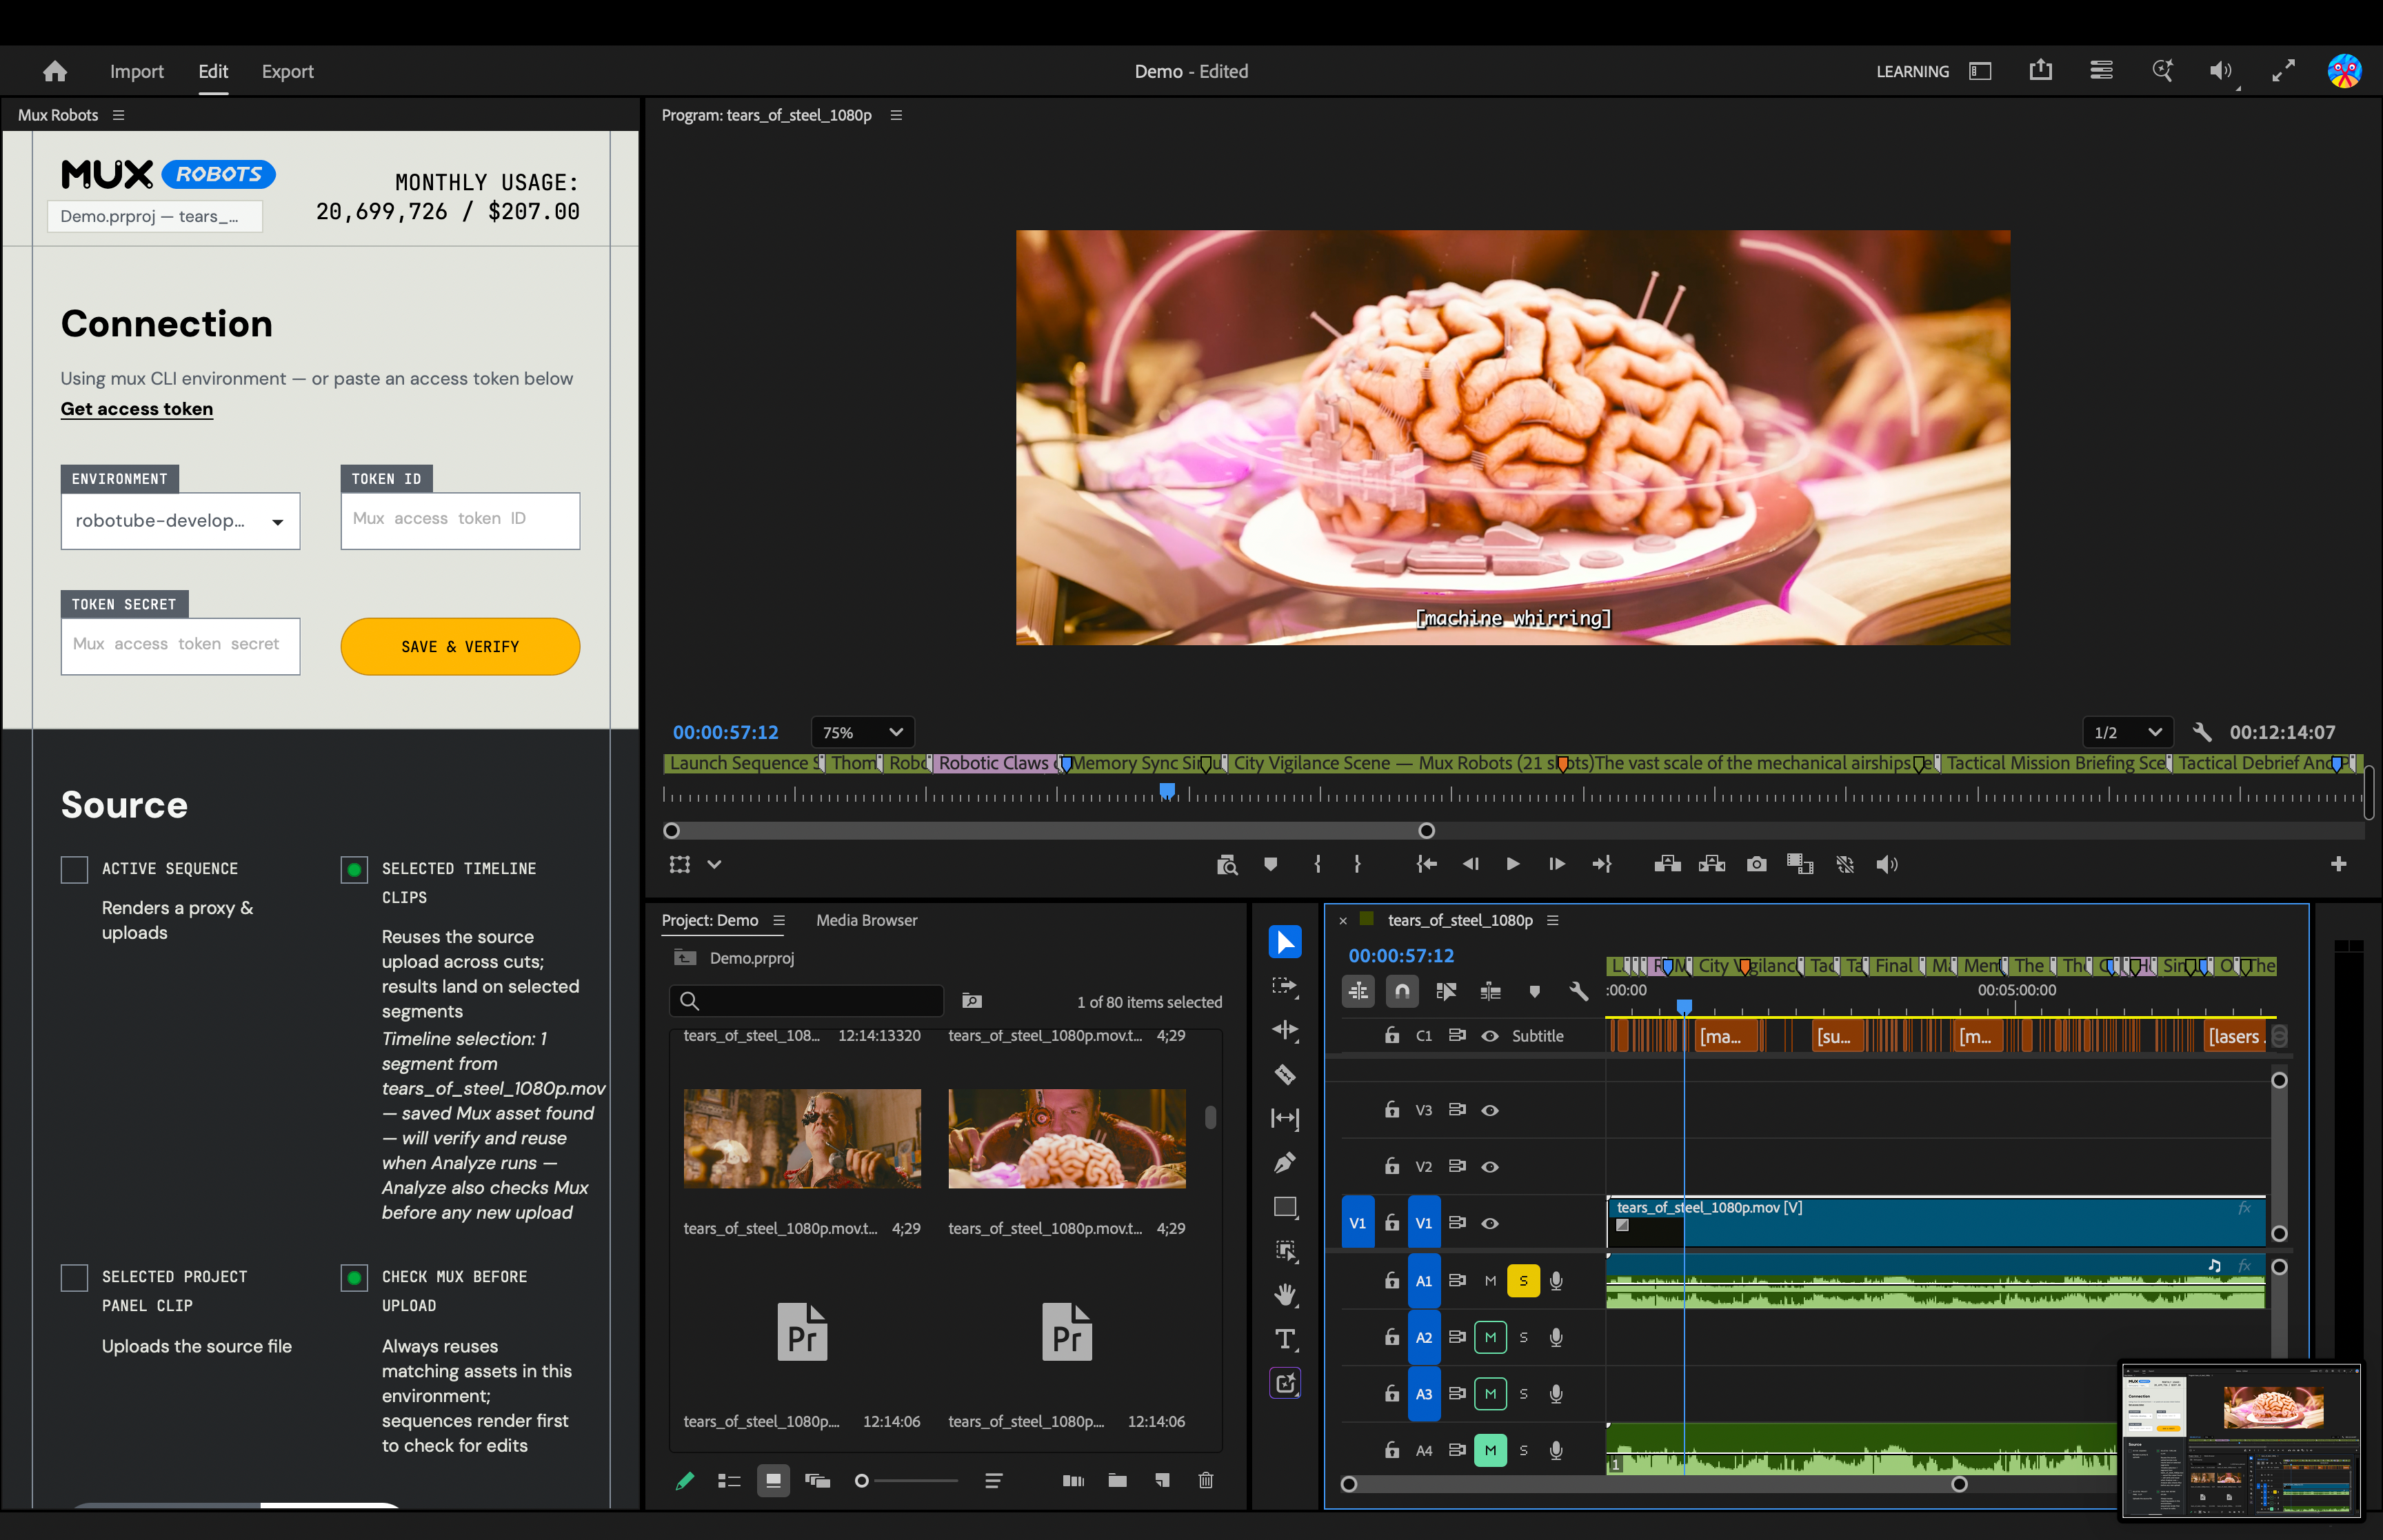
The timeline is the source of truth for our video editor Tim. Since editors spend so much time monitoring what appears on the timeline, the output of a Mux Robots job fits perfectly there.
Let’s use the Mux Robots Generate Chapters workflow as an example. Take a look at this API response:
{
  "chapters": [
    {
      "title": "Introduction to Mux Robots",
      "start_time": 0
    },
    {
      "title": "Introducing Find Scenes and Shots",
      "start_time": 61
    },
    {
      "title": "Detection Algorithms and Workflow Features",
      "start_time": 94
    },
    {
      "title": "User Feedback and Product Roadmap",
      "start_time": 155
    },
    {
      "title": "Customer Stories and Success Cases",
      "start_time": 189
    },
    {
      "title": "Conclusion and Best Practices",
      "start_time": 217
    }
  ]
}
When generating chapters, you get the title of each chapter in the language you choose, along with the time at which that chapter begins. It’s a simple output, but it provides a lot of value for a video editor.
Take a look at how the chapters are added when you use the plugin:
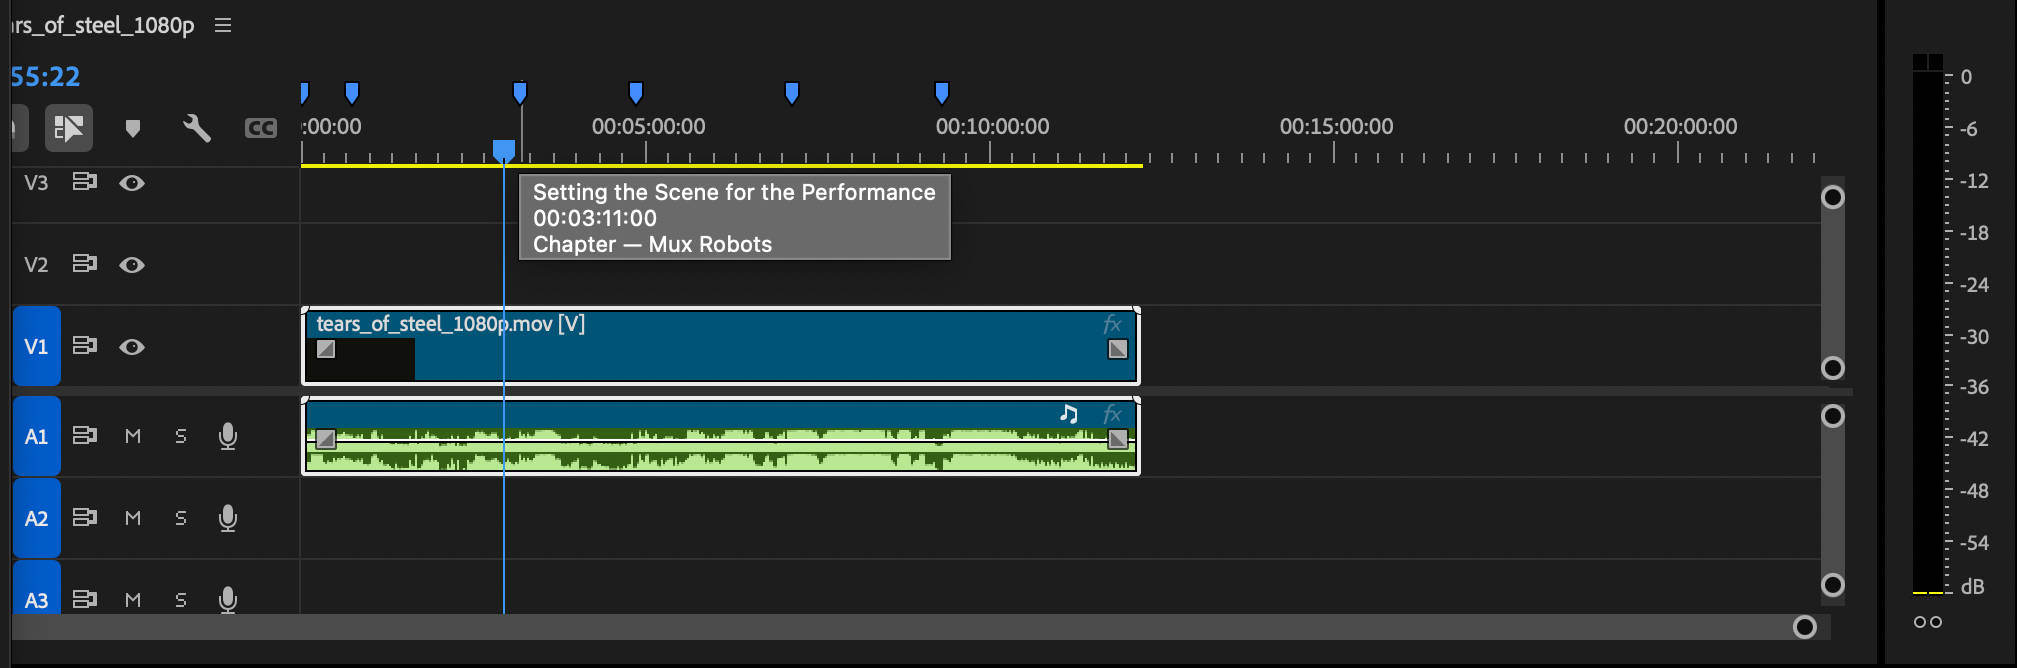
Each blue marker represents a chapter. There are other types of markers as well. Here’s what happens when I run a Find Key Moments workflow:
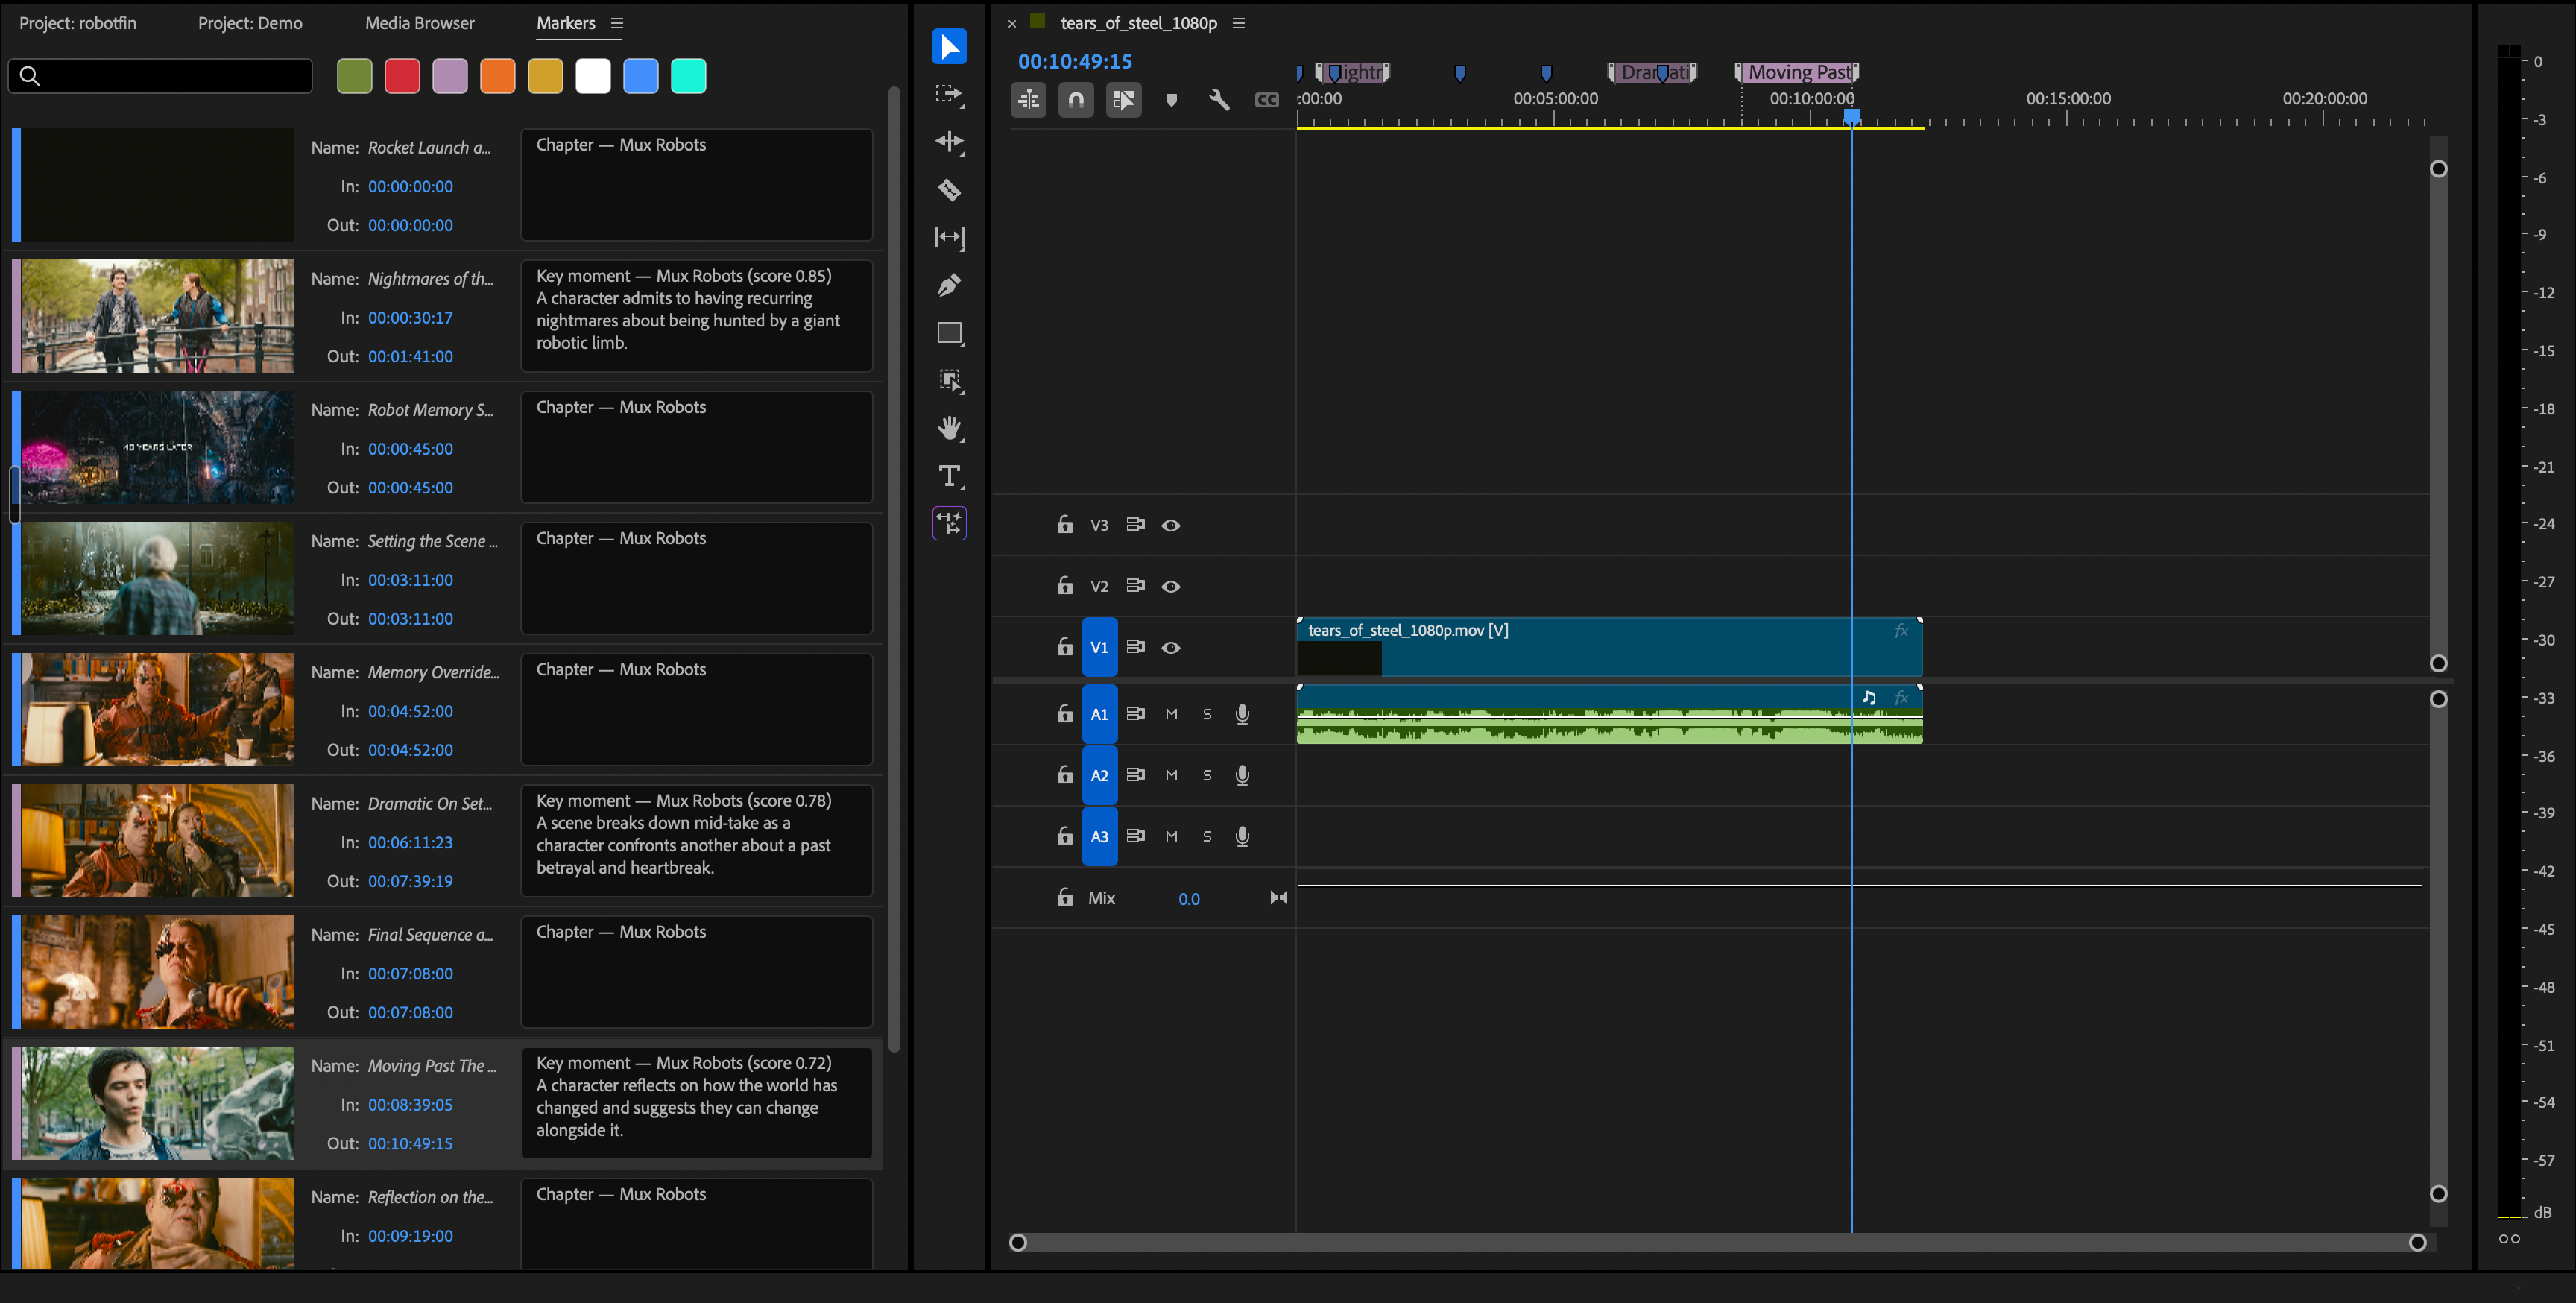
The Find Key Moments job — represented by the purple markers — focuses on identifying the most compelling moments in your videos. You can also add parameters to steer the output that appears on the timeline. The markers use a different color, and details from the job’s output. appear when you hover over one.
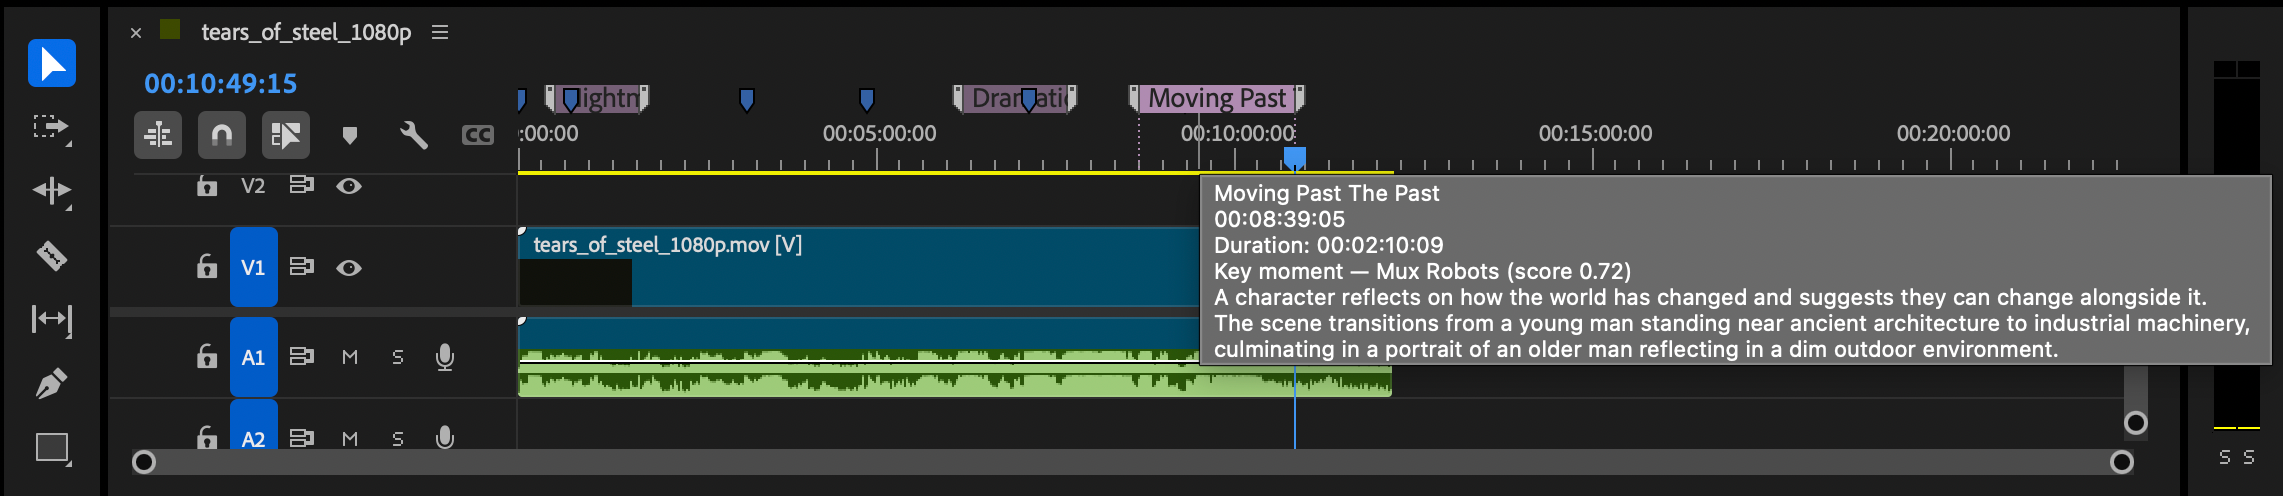
This plugin also takes advantage of Directives, which allow you to bundle several Mux Robots workflows into a single API call. You can select the workflows you want the plugin to run and automatically receive markers on your timeline containing the necessary output data.
Just about every available Mux Robots workflow is used in this plugin. We used Directives to sequence different workflows with a single click. For example, captions are required to generate chapters and key moments. When I select Generate Premium Captions, Find Key Moments, and Generate Chapters, the plugin creates a Directive that generates the captions first, followed by the chapters and key moments that depend on the caption track.
Localize with generated translations
Another highlight of this plugin is that we’ve brought audio dubbing directly into the editor. Simply select the languages in which you want to generate translated audio or captions, and Mux Robots will place those assets directly on your Premiere Pro timeline.
Caption tracks work similarly, but they are added to Premiere Pro’s Media Browser, where you can drag them into your project as needed. Either way, you have plenty of languages to choose from.
Editing with Mux Robots is about more than adding markers to the timeline. You can generate assets for a global audience on the fly.
Use it in your project
This plugin is available through the Adobe Creative Cloud Stock & Marketplace.
Click here to install or search for Mux Robots in Creative Cloud, install the plugin, and open it in Premiere Pro — you’re good to go. Just make sure you have a Mux Token ID and secret to run a Mux Robots job with the plugin.